BMW E36 Start Button
BMW E36 Start Button
Introduction
It has been a dream of mine since getting my car to install a Z8 start button in it just to give my car that little difference from most other E36 3's you'll see on the road or on the forums. This mod wasn't to hard to do and was relatively cheap even going with BMW Parts. It cost me about 90 bucks total after buying the parts I needed and things such as wire, relay, solder, etc.
Materials
1. One Momentary Start Button - ( I used a Z8 Start Button from Pacific BMW p/n 61 31 8 377 343 Z8 )
2. Two Contact Pins/Wires - ( Again I purchased from Pacific BMW p/n 61 13 0 006 665 )
3. One 30A/12 V Relay - ( Can be purchased at any local car parts store such as Autozone or Advance Auto Parts)
4. One Roll of Electrical Tape
5. Spool of 14-16 guage wire
Tools Required
1. Wire Stripper/Crimper
2. Wire Taps - (Optional, can use electrical tape also)
3. Wire Cutters
4. Wire Ties
5. Soldering Iron
6. Dremel w/ Grinding Stone
Getting Started
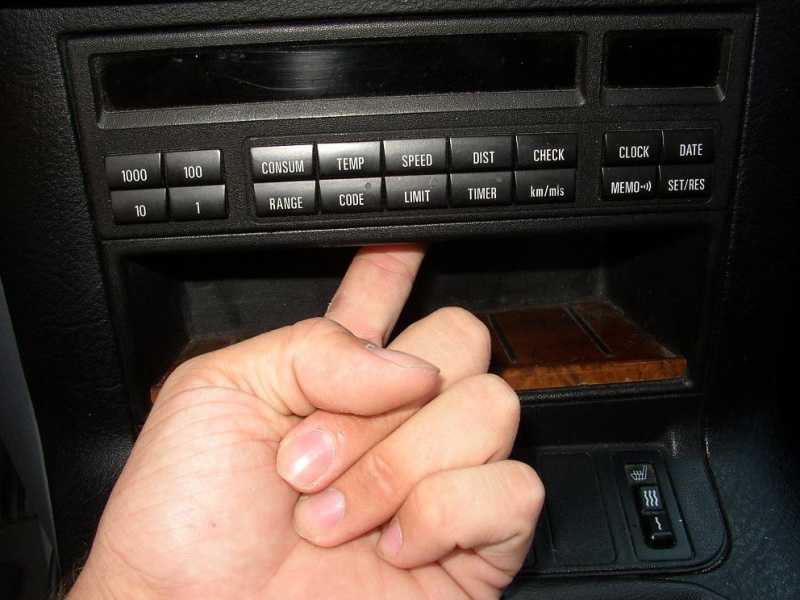
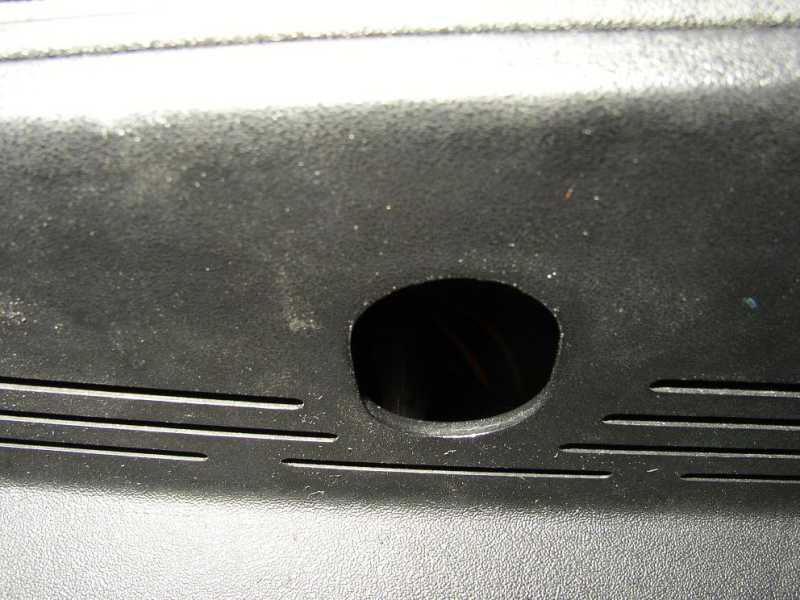
Step 1: First thing your going to need to do is remove your OBC and Console to remove the cigarette lighter so you can modify the hole to fit your new start button. To do this use your finger and pull the OBC out through the hole in sunglass holder. You may disconnect it if you would like, it will not retain its memory though. The first picture shows where to put your finger to find the hole to reach through to the OBC, the second picture is the actual hole, just feel for it you'll have no problems im sure.
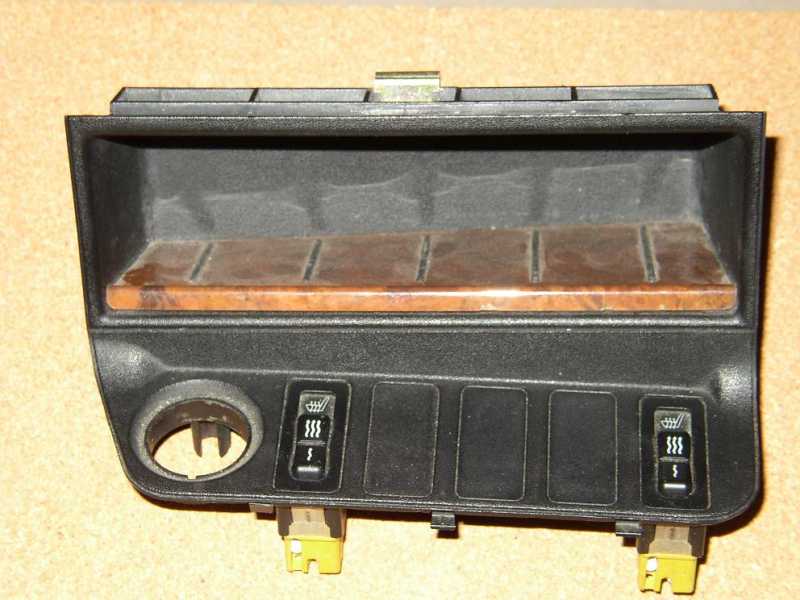
Step 2: Next you want to pull out your console, be careful when pulling this out, it should just pop out but there will be some wires you'll need to disconnect: cigarette power, heated seats, and a light bulb. Once this is out pop the cigarette lighter out from the console. Push up on it from the bottom, will take a little bit of force but it will pop right out.
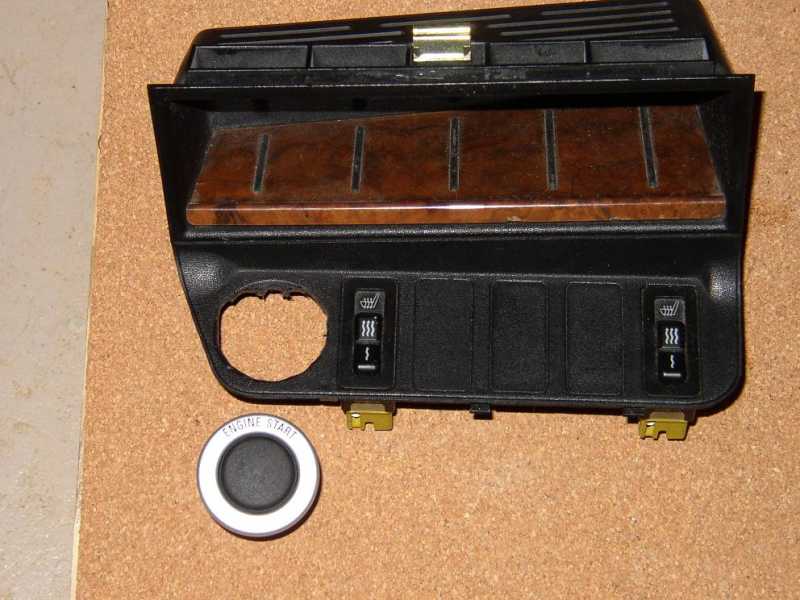
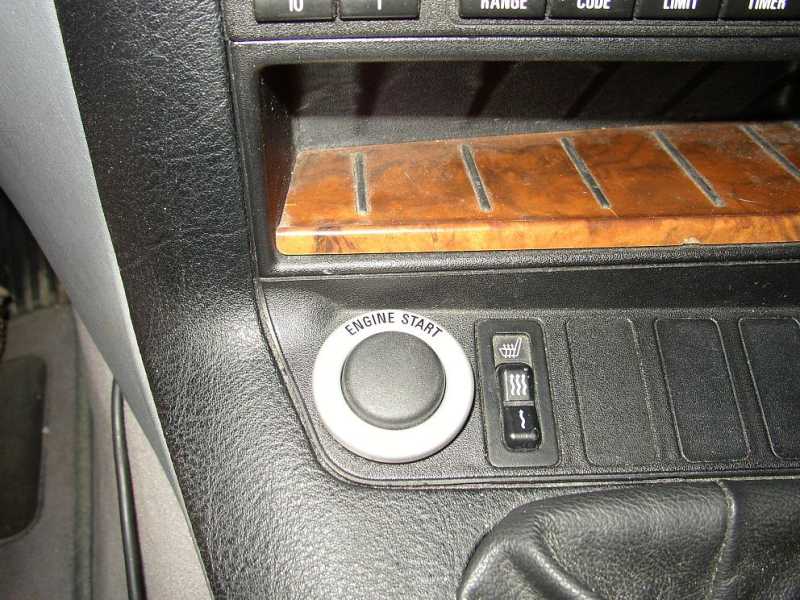
Step 3: Now to the dremel. Use the dremel with some type of grinding stone to make the hole a good size for your start button. I made the mistake of using a carbite cutter, just go with a good grinding stone, it will be much easier and look much better, notice how mine isn't a perfect circle. Not to worry though if you make a little bit of a mistake, the start button will cover it up and you won't be able to tell at all. Once you think you have the correct size put the start button in to test for a good fit.
Step 4: Now to the fun stuff. Your going to be spending a lot of time under your steering column so what I recommend to do is remove your driver seat. Much easier for me since I have racing seats and past experience with it but it really made it so much easier to do to be able to lay down in the car and have plenty of work space. Now is time to remove the driver side lower dash panel. There are three screws, one to the left and right of the steering wheel, and one closer to the gas pedal.
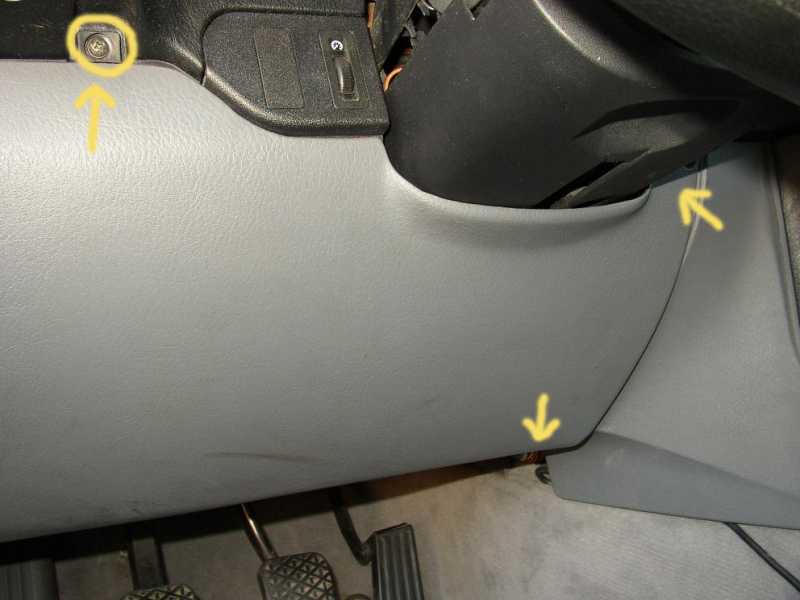
Step 5: Next step is to remove the the metal panel that is protecting all the wiring. There are 3 bolts you'll need to remove.
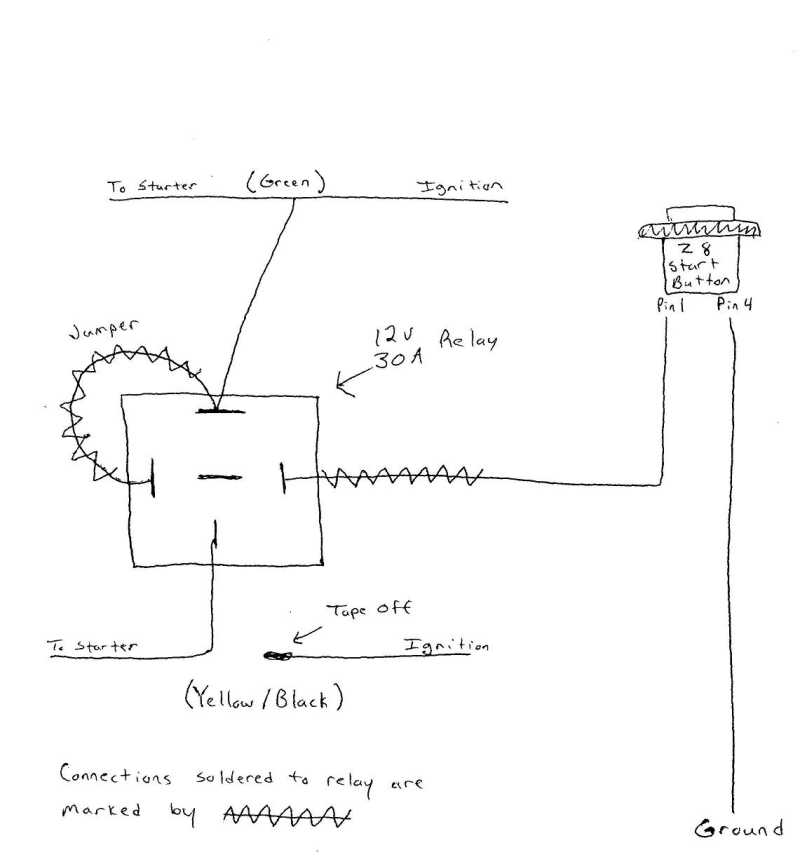
Step 6: Now its time to break out the nifty relay you bought. Below is a wiring diagram for the relay. I soldered a few of the connections to ensure good quality, others had to be done with electrical tape just because I wasn't about to try doing some soldering with my face under the relay and in the midst of about 1000 wires. The wires I soldered on were done in the house before I installed the relay in the car, they are noted on the diagram.
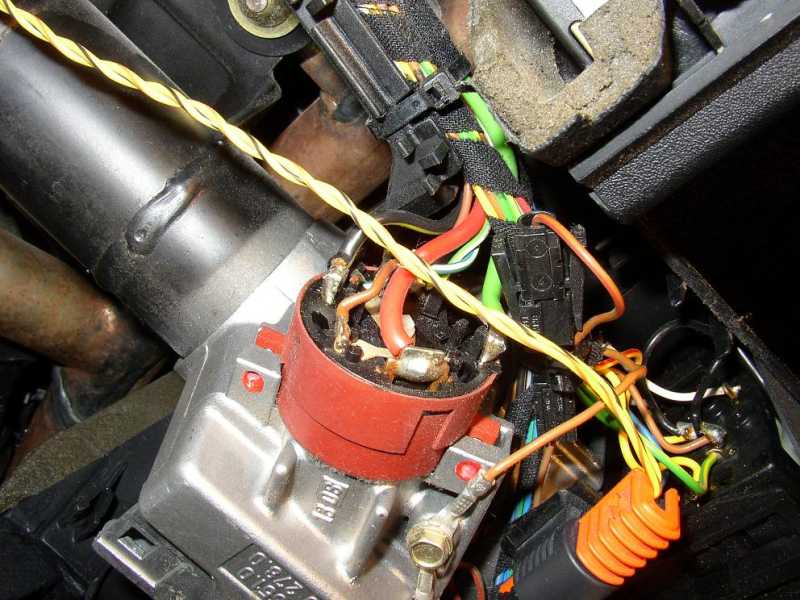
Step 7: Here goes nothing, time to make the first cut. Find the green wire and give it a cut, in the middle so you have some slack on both sides. With a piece of wire about 4" long tap it into the green wire and tape all ends together. With your piece of wire you tapped into the green wire connect it to the relay as shown on the wiring diagram (see above). Below is a picture of the ignition harness, this is where the wires you are tapping terminate. Your going to want to cut them down towards the harness that goes towards the starter as shown in the second picture.
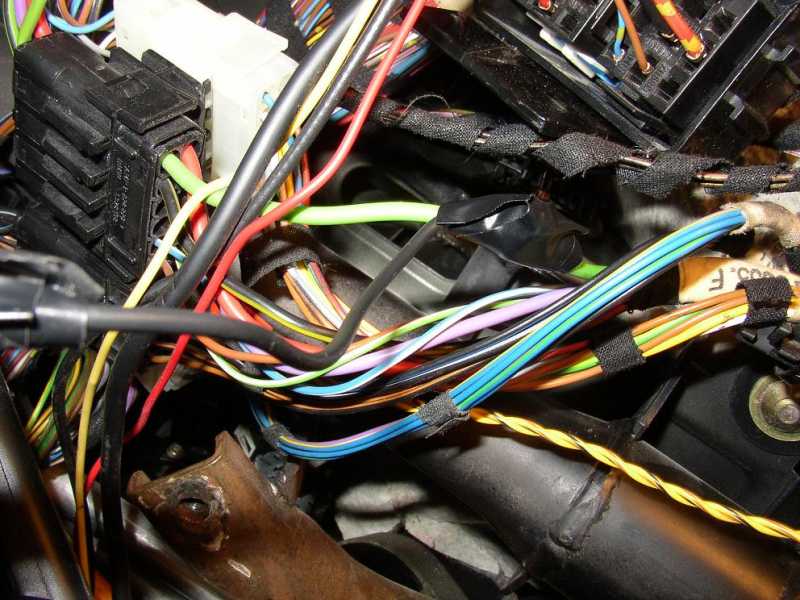
Step 8: Next is to cut the Yellow/Black wire. (NOTE - Some cars may have a Green/Black wire instead of Yellow/Black, there is no difference in the cars, just different productions of the E36 3 series) Now is decision time, if you want your car to start with only the button ( which is what I did ) tape off the end of the wire that goes towards the ignition. If you want your car to start with either the key or the button use the same tap as you did in the previous step. Tap another 4" wire to the side of the Yellow/Black wire that goes towards the starter. Connect it to the relay as shown in the wiring diagram (see above).

Step 9: Here is just a picture of the relay used with the wires connected to it
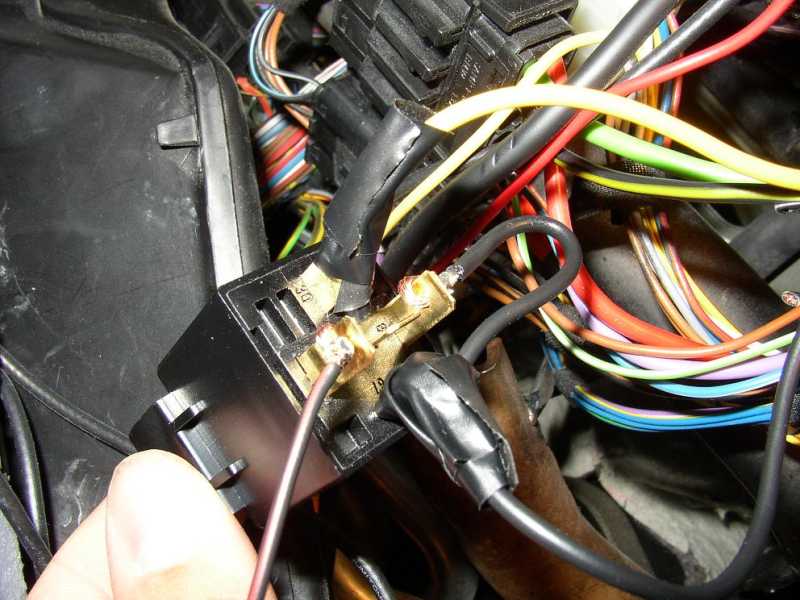
Step 10: Now run the contact pin from the relay to up to where the start button will be located. ( If your using the Z8 Start Button connect the contact pin to pin number 1 ) Your other contact pin just needs to be ground. So find a good place to ground it and connect this pin to pin number 4 on the start button
Step 11: Now go ahead and put your key in and turn it to the on position and press your start button. If it doesn't work right away ( which mine didn't ) check your ground to make sure it has a good ground and from there check your wire taps.
Step 12: Go ahead and throw everything back together, wire tie any wires that are loose, and now and marvel at the good job you did. Feel free to show it off to everybody, lots of people will be impressed
Conclusion
This really wasn't that hard of a modification to do. I had no real experience dealing with this kind of wiring and I had no problem doing this. Have fun, pay attention to what you are cutting and pay attention to detail to make sure you have the best looking start button. Feel free to contact me at colinnicol@gmail.com if you have any questions.
About The Author
Colin Nicol