BMW E36/S52 Fuel Filter Change
BMW E36/S52 Fuel Filter Change
I wanted to complete a fuel filter change on my 1998 328is. However, after getting under my car, I quickly realized that most of the DIY articles on the Internet were not valid for my car. This is a DIY Fuel Filter Change article for M52 E36 vehicles (1996 - 1998).
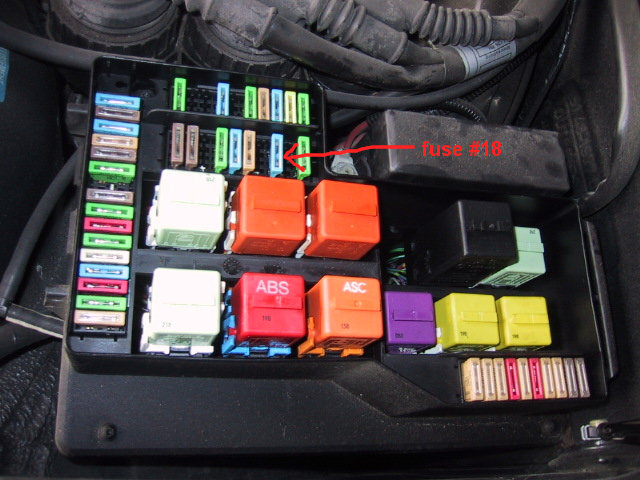
Step 1: This is the most important step. Take out the fuel pump fuse and try to start the car twice. Which fuse is it? Well, I opened up my Bentley manual it said Fuse #18 but pointed me to the wrong fuse in the diagram. However, looking at the diagram on the back of my fuse box cover, I found the proper fuse #18. Note: May be different for your vehicle.
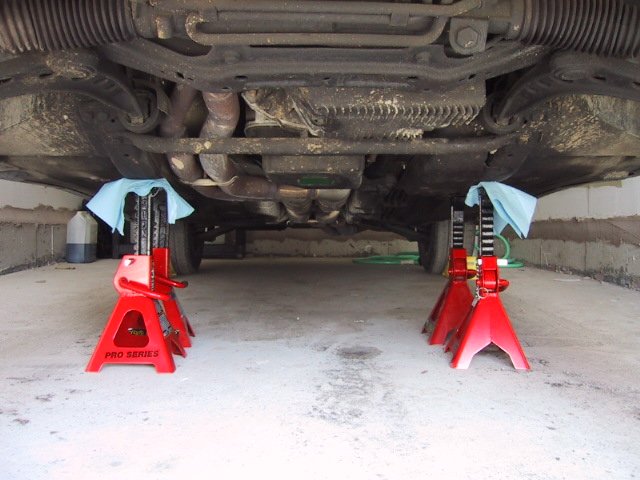
Step 2: Jack the front of the car up. I prefer using these rails over the pads on the side. I also like to leave an extra set of jack stands under there in case of emergency.
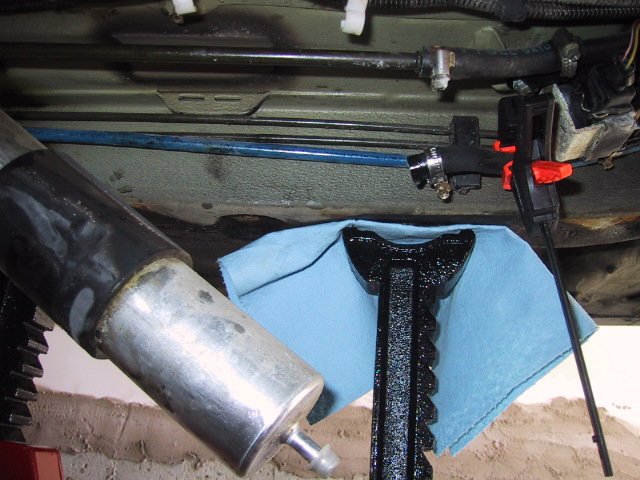
Step 3: Locate the fuel filter. It is usually found underneat the passenger side door. On my car, there is a cover over it.
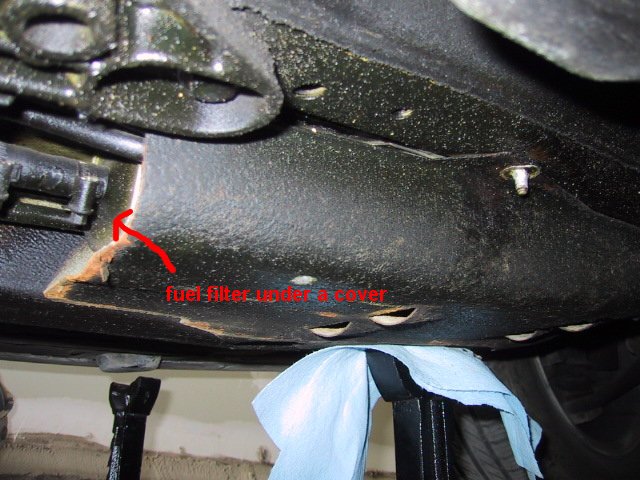
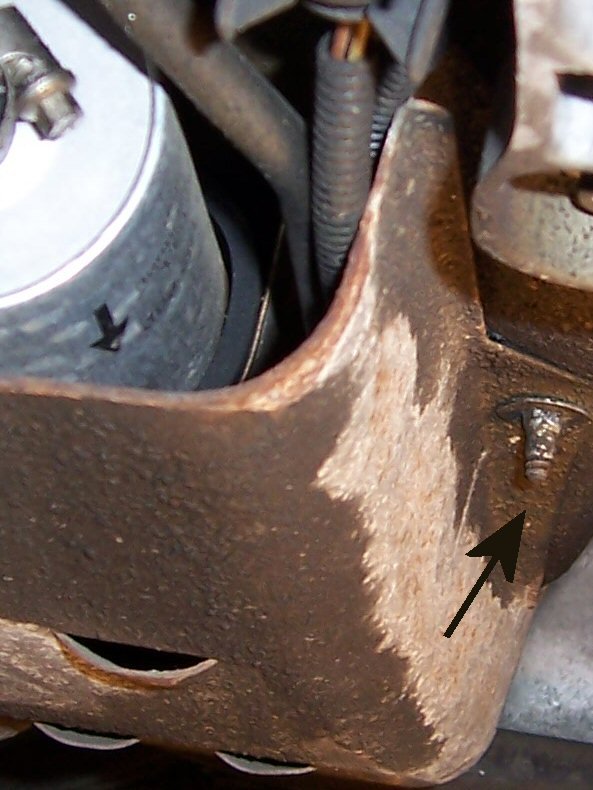
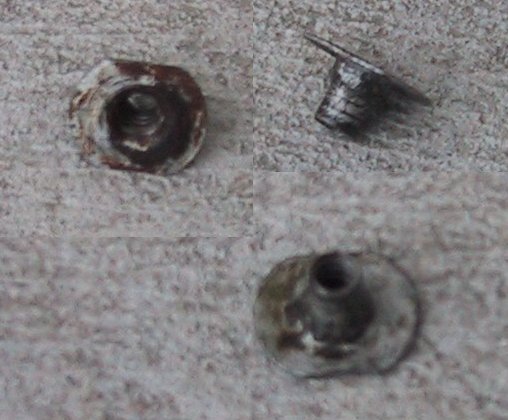
Step 4: Remove the cover. There are two 8mm hex screws and two very odd little screws that I had a hard time getting off. They are hard to grip onto and do not fit any metric socket. It appears like a screw came through from the inside -- but this is not necessarily the case. To get it off, use a set of needle nose pliers or some other tool to allow you to get a strong grip. Twist counter-clockwise.
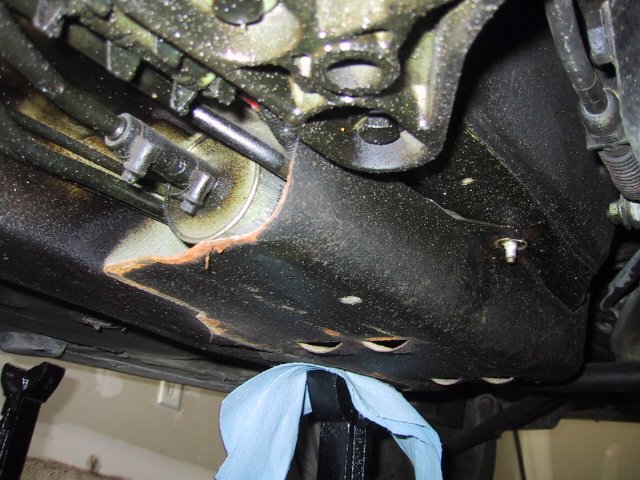
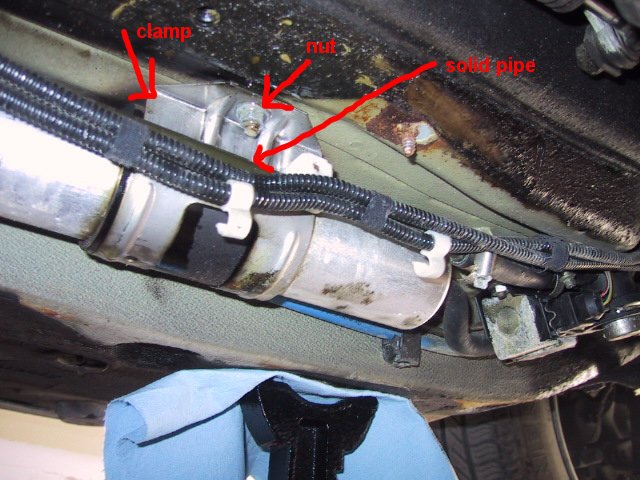
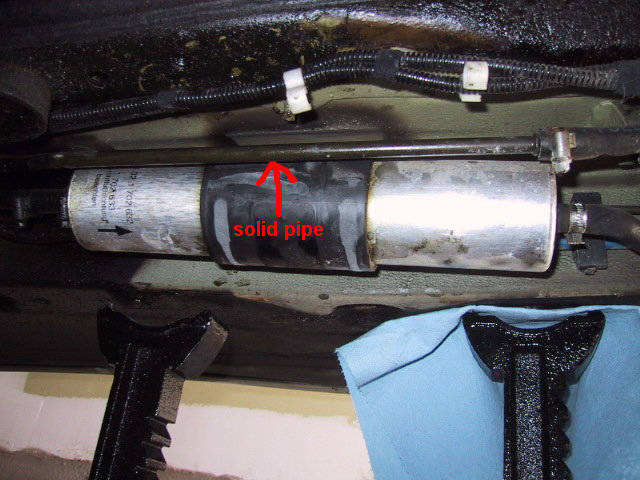
Step 5: Remove the clamp holding the filter in place. Remove the nut shown in the picture. It's a little hard to get a socket in that space, I had to use pliers. The clamp is not easily removed -- there is a solid pipe directly below it. On the other side (hard to see) the clamp has two little finger-like pieces slide into equivalent holes. Once the nut is removed, pull the clamp down and apply pressure to the solid pipe to move it out of the way. Since one side of the pipe is attached to a hose, this is not too hard to move.
Step 6: The hard part is done! Now, remove the hose that is attached to the side of the filter towards the front of the car. This is accomplished by unscrewing the clamp on the hose and prying it off with a flathead screwdriver. The moment the hose comes off, fuel will starta to spill from the filter. The new filter comes with a cap. Utilize this cap to seal off the old filter. In the picture you can see I made an attempt to clamp the hose but I think there was no benefit to this. No fuel came out of the hoses whatsoever (because of Step 1).
Step 7: Similarly remove the hose on the other end and replace the filter with the new one. In my case, only a few drops of fuel came out of this hose (because of Step 1).
Step 8: Connect the front side of new filter to the front hose and tighten the screw clamps on both sides.
Step 9: Put the filter clamp back on. This is reverse procedure of how it was taken off.
Step 10: Put the fuel filter cover back on.
Step 11: Put the fuel pump fuse back in place.
Step 12: Drop the car off jack stands. Smile, because you own The Ultimate Driving Machine.
Conclusion: The hardest part is getting the car up on jack stands. The most important step is removing the fuse to the fuse pump. This is a relatively easy DIY.
Note: The metal hose clamps should be replaced. This will reduce the changes of leaks in the future.
About The Author
Vinay