BMW OEM Alarm Installation (E36/S50)
BMW OEM Alarm Installation (E36/S50)
I bought a used BMW OEM alarm for 1995 or older E36's to put in my 1995 325is, but the unit came without installation instructions. I found a couple of DIY articles on 96+ alarms but nothing for the earlier version: here and here
Although these articles were enough to install the unit, I offer this piece to "fill in the gaps" and make the job a little easier and quicker.
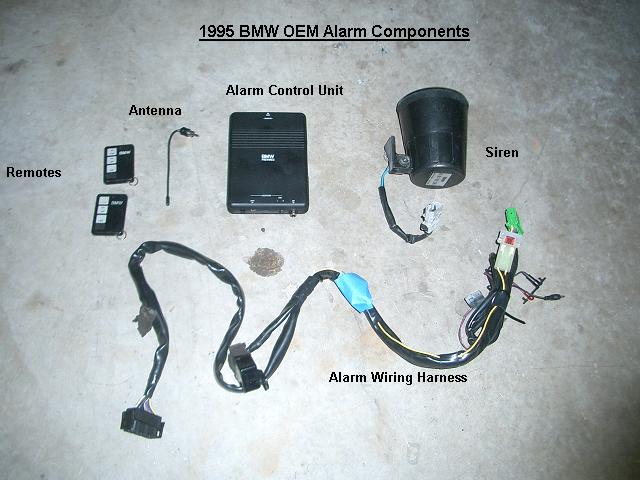
Here are the parts that came with the unit:
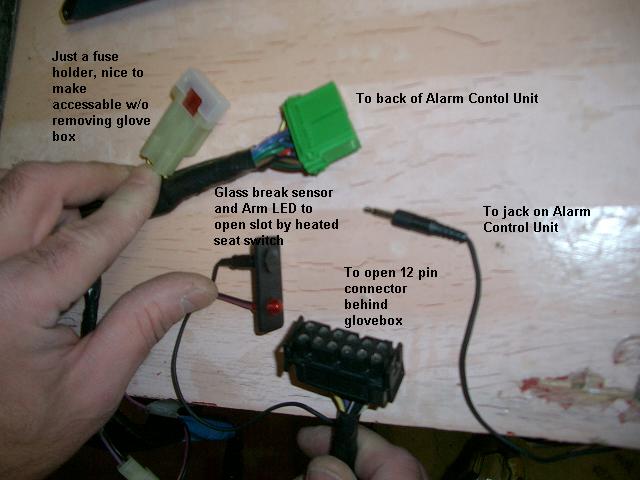
Here are the connectors for future reference:
Now let's get at it!
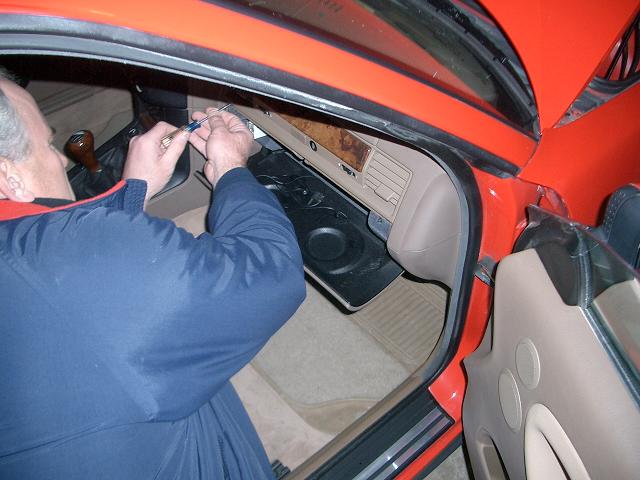
Step 1: Remove glove box: Plenty of info on how to do this, mine had six screws and the 10mm bolt under the light. Disconnect all wiring. Put aside.
Step 2: Remove the trim panel under the glove box: No pictures, just kind of work it out carefully, as this is just pressed board and is fragile.
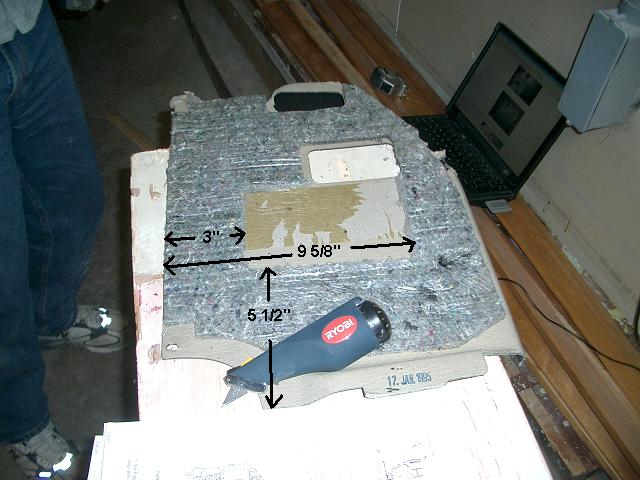
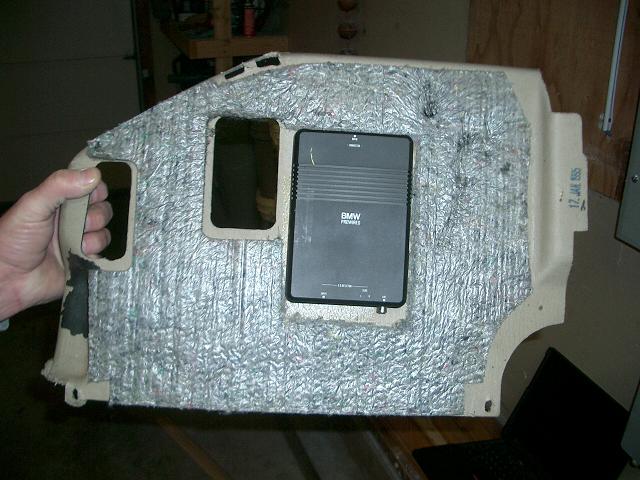
Step 3: Prepare trim panel for Alarm CU Mounting: The inside of the trim panel has insulation that must be removed to mount the alarm control unit with self-adhesive Velcro strips. These strips come with the unit, but since mine was used I had to run up to Ace Hardware and buy some... 6" cost me $.88. I used the dimensions from the Circle BMW source listed, worked for the 1995 install. I found that by deeply scoring the outside of this rectangle, the insulation peeled right off in one piece (no heat gun required). Hope you are so lucky!
Step 4: Mount the Alarm Control Unit: Get two pairs of matching Velcro strips. To make alignment easy, affix two strips on the back of the unit, and connect the matching strips to these. Pull off the adhesive and stick to the trim panel. If my instructions were not too confusing, this is what you will have!
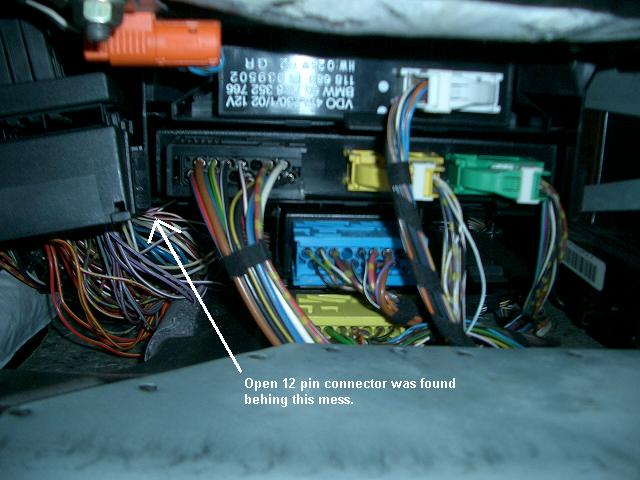
Step 5: Connect Alarm Control Unit: First plug green connector to back of unit. Then plug black 12-pin female connector on wiring harness to open 12-pin male connector behind glove box. Not sure where yours will be, but the location of mine is shown. Find it... it's in there baby!
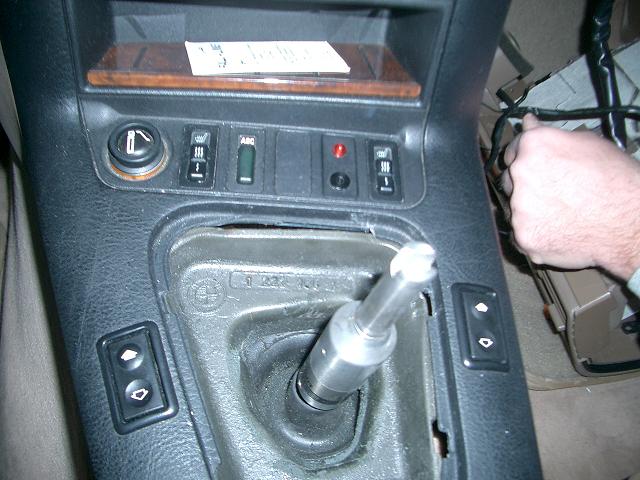
Step 6: Install/Connect LED/Glass Break Microphone: Fish the LED/Glass Break Microphone that is part of the wiring harness under the side of the center console to the position shown. Pop out the existing insert and pop in the LED/GB assembly. I found it easier with the shift boot removed. Run the jack wire back through and to the Alarm Control Unit. (I taped the jack wire to the larger wire coming from the harness to help pull it back).
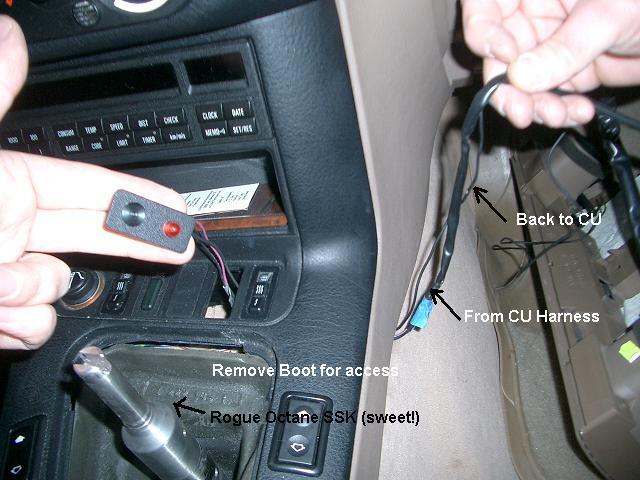
Once gain, if I haven't confused you, here is the "after":
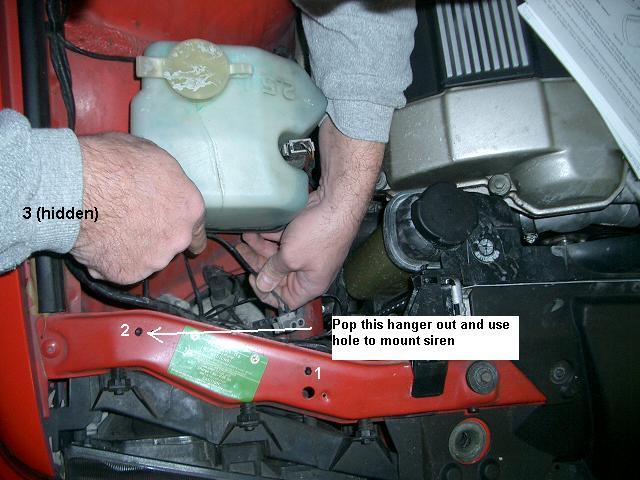
Step 7: Install Siren: The siren is installed near the front right headlight assembly. It plugs into an open female connector that comes off the wiring bundle for the headlight. To better access this bundle, remove it from the three hangers located as shown. As you can see the plug comes off this bundle. A previous owner had installed an alarm, so my plug was simply hanging loose. Not sure if this will be the same on a "virgin" car, but look for it, it's there. Mount the siren by removing the hanger #2, just press on the tab to pop it out. This is the hole you will use to mount the siren bracket:
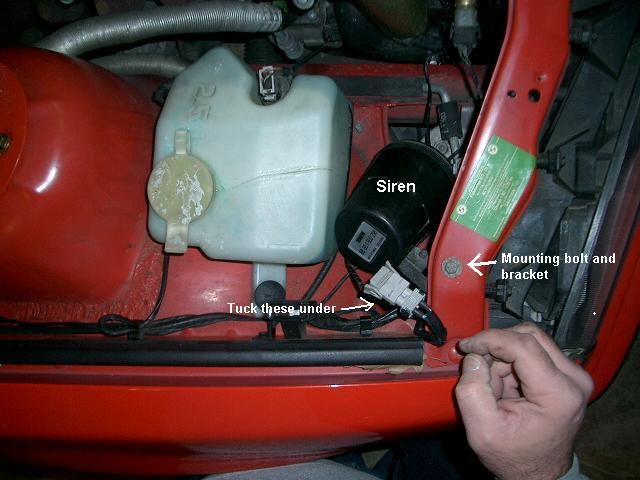
Finish mounting the siren and plug it in, and you're done! Tuck loose wires under cross member. Tie wrap if you deem necessary (I didn't):
Finishing Steps: All connections are done! Before you put everything back together, open the Alarm Control Unit and set the five dip switches for proper settings. (I kept the defaults). Test unit to make sure everything is working and you're satisfied.
Oh, plug in the antenna to the antenna jack on front of unit (almost forgot)
Reassemble the trim panel and glovebox. I found it best not to bundle or wrap the Control Unit wiring harness. It's easier to find places to tuck it in that way because room is tight.
Enjoy your remote lock/unlock (what a novel concept!) and the fact that your baby is safe (well, safer!)
Hope you all find this helpful.
About The Author
hellrot325