BMW E36 RTAB Without Special Tools
BMW E36 RTAB Without Special Tools
Alright this is the official RTAB DIY without the Special BMW TOOLS! I was convinced that somebody needed to do a write up on how to do the RTAB's without having access to the 600 dollar special tools to do the job with. I mean come on how many of us are going to put out that kind of money to do this job. In fact who wants to even pay 100 bucks for a tool to do the job? Exactly my thoughts
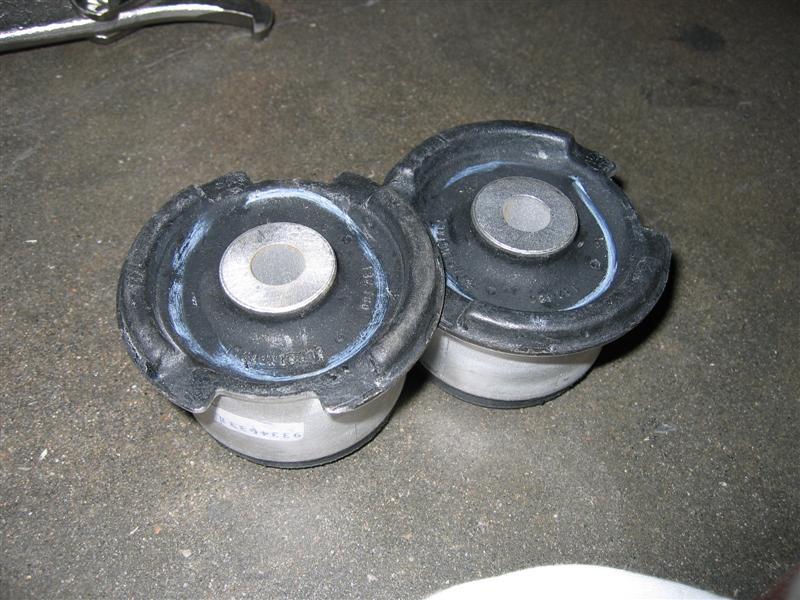
To start with you will need to obtain a new set of bushings the M3 96+ ones. I also bought some shims for the rear trailing arms from edge motorwerks. I believe ground control also sells some shims. These shims however are not necessary if you don't feel that you want them or want to spend the money on them.
Here is a list of the essential tools you will need, and others are probably helpful too so don't hesitate to bust out your favorite tools in addition to the ones listed here.
You will need 2 18mm sockets for getting the 18mm bolt out of the rear trailing arm bushing, you will need a large flat head screw driver, hammer, power drill, 7/16" drill bit, and lastly other various socket sizes for pulling off all of the surrounding hardware and such.
The first step is to jack up the car put it on stands and make sure it's all supported securely the next step is to pull the rear wheel off on the side you are working on. After the wheel is off you will need to remove the 10mm bolts that hold the brake line to the RTA. If you don't the brake lines will be holding up the arm which will put a lot of unneeded stress on the brake lines. After you have the two bolts holding the bracket to the arm its time to remove the RTAB consol from the underbody of the car.
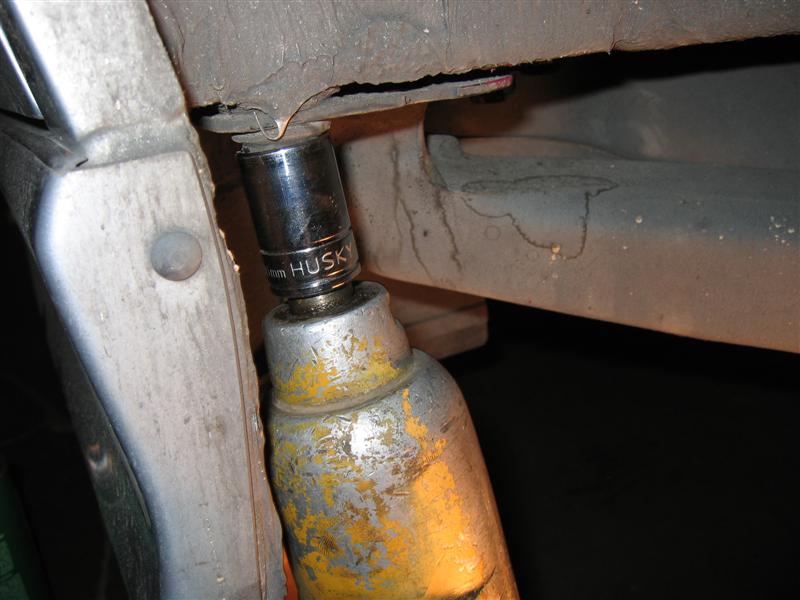
This bracket is held in by 3 18 mm bolts. The firs thing to do is just make some marks as to where the bracket is lined up. I just scratched away all of the grime around the bracket so I could see a clear outline of it through all the grease and grime that had collected. After you have it marked pull the three bolts out allowing the arm to drop down. Now you will have the RTAB consol in front of you and its time to take out the 18mm bolt that holds the bracket to the actual RTA. Put a socket on either side and use a breaker bar and ratchet or impact wrench if you're using one to loosen these up. After the bolt is out just slide the carrier off and you should be left with just the front of the arm and the old bushing in the arm.
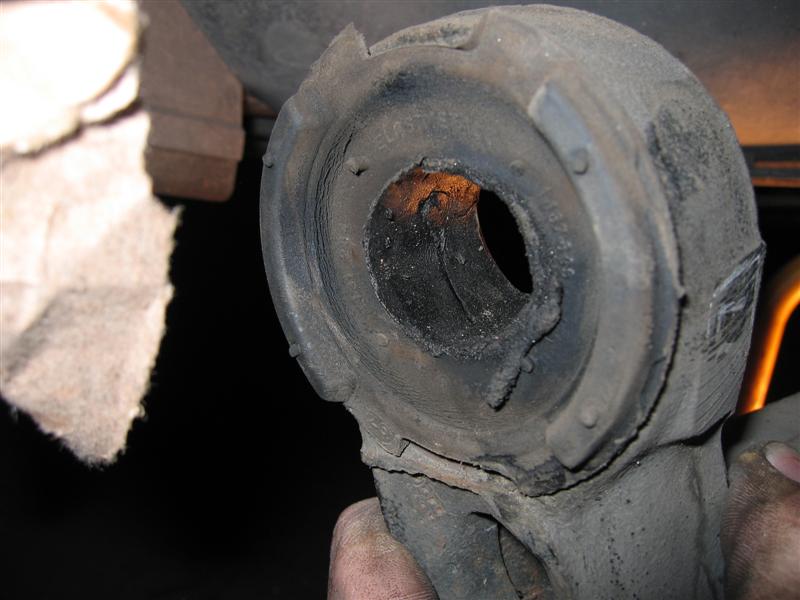
Now comes the fun part we have to get this old bushing out of the arm. This is where that special tool would be really handy but us poor folk will have to tackle this another way. (The Ghetto way ) You take your power drill with a 5/16" drill bit and start drilling holes around the aluminum center in the bushing. Try to make the holes as close to each other as possible and go all the way around the bushing drilling all the way through the rubber. Kind of twist the drill around a bit while you're drilling causing it to cut through more rubber. After this is done the center part of the bushing should be able to be ripped out leaving a hole in the middle of the rubber area.
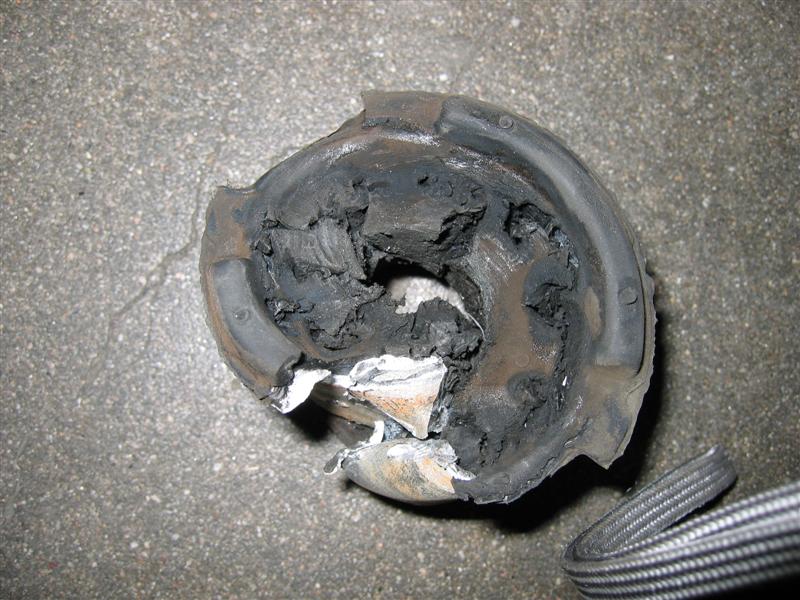
Now Measure the gap between the flange and the trailing arm real quick with some feeler gauges and make note of this gap. You will have to put the new bushing in with the same gap. To get the rest of this bushing out take your huge flat head screw driver and put it between that flange and the trailing arm and start hammering away on it. The metal of the bushing should start to bend inward toward the hole you drilled. AS it does it will create a gap between the metal sleeve of the bushing and the hole in the RTA. Put the flat head in this gap and drive it deeper into the hole using a wedging motion each time to bend the bushing in while you're driving the screw driver deeper into the bushing hole. Finally you should be able to just wedge the bushing right out of the RTA. This is how I got mine out. Only I used an air chisel to start with, and then went to the screw driver but both methods will work.
This is a picture of how the bushing should bend up toward the center as you drive your screw driver in further and further.
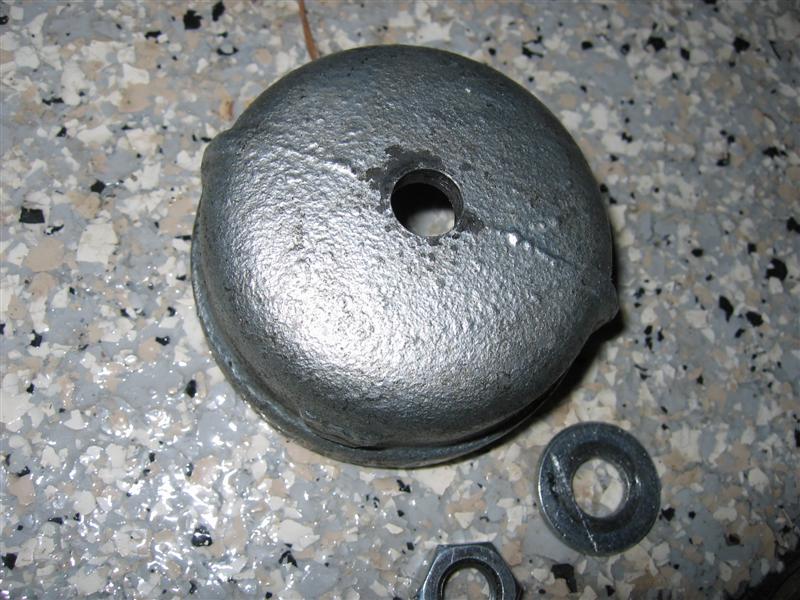
Now it is time to press the new bushings in. This is where it will be necessary for you to make your own custom Home Depot tool. Run to the store and pick up two steel 2" end caps and a 7/16" threaded rod with two 7/16" nuts and washers. Drill a hole in the center of both caps and cut the rod so that it is about 6 inches long, a nice manageable size. Thread a nut and washer on one side of the rod an run it through one of the end caps.
The first half of the tool that goes on the inside of the RTA.
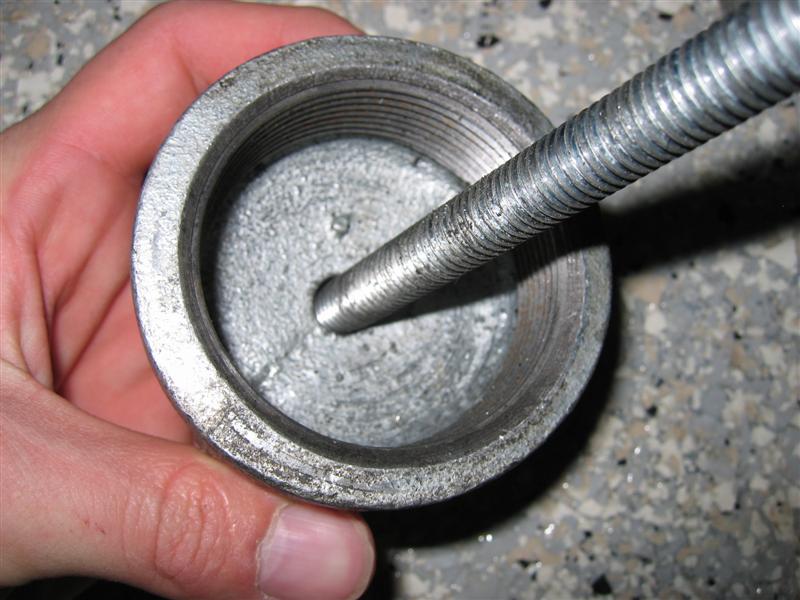
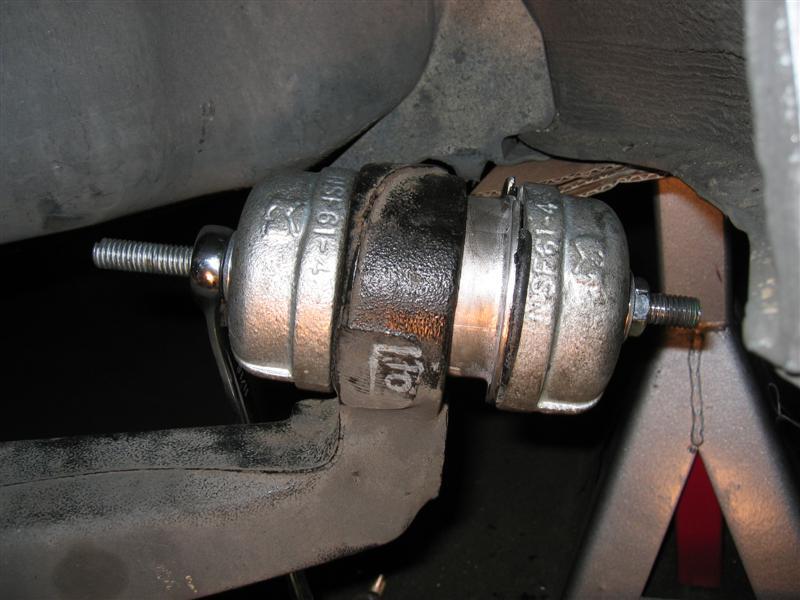
I used a bit of dish soap to lube the bushing up with. Place the cap with the rod through it on the inside of the RTA with the opening of the cap facing the outside of the car. Put the rod through the center hole of the bushing and then put the other cap on with the opening of the cap facing the new bushing. Thread another nut on to hold the whole thing together. Now align the bushing so that the notches in the flange of the new bushings are up and down just as they were in the old ones that used to be pressed into the RTA. Simply put a wrench on one side to hold the nut in place and a socket on the other and start tightening up the nuts so the caps start moving together pressing the bushings into the RTA.
I found it didn't take much to get them in only took bout 2 min per side to press them in. When you get near the end measure out the gap between the flange of the new bushing and the trailing arm that you measured on the old ones before you pulled them out. Its important to make sure that you get this same gap again with the new bushings.
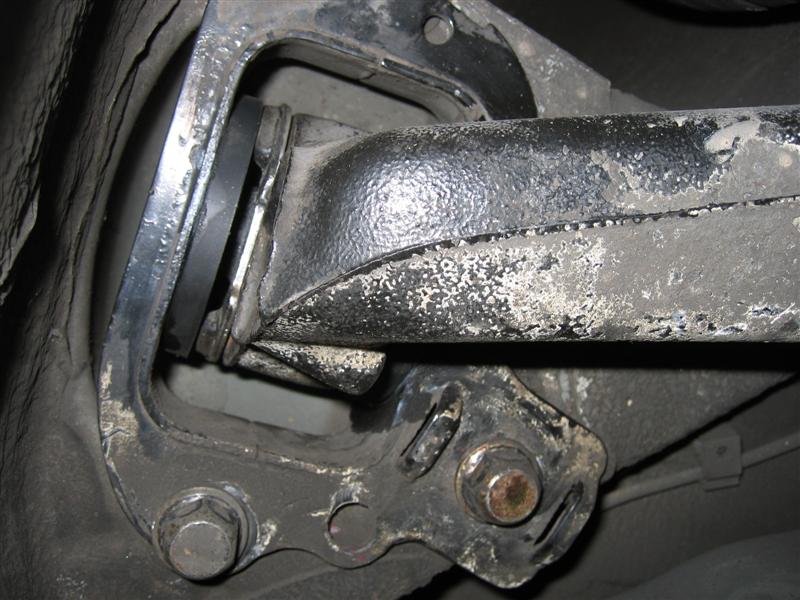
Whew well your now done with the worst part of the whole job. Its now time to put the carrier back on. First put the shims in if you have them and then put the carrier back on and slide the 18 mm bolt through and thread the nut on the other side so your ready to tighten it all up. Take a rod and align it so its flat with the carrier and about 8mm above the lower disc brake bracket mounting hole. After you get it aligned right put a line on the consol and the RTA so you know where the orientation of the bracket is supposed to be. Now tighten that bolt up to 81 ft/lb torque and try to keep those lines lined up while you tighten it. After you have done this just bolt up the carrier in the reverse process you took it off being careful to align it up to the marks you made before you took it off. After you get it all aligned up just tighten up the bolts to 57 ft/lbs torque and your all done with your first side. Congrats.
About The Author
Bimmerforums.com leedawg