BMW E36 Power Seat Switch Replacement
BMW E36 Power Seat Switch Replacement
Faced with a two broken power seat switches, and finding ittle in either Bentley or TIS, I thought I would post a DIY. I would think that others have this problem, as the switch is very easy to break... step on or kick the knob and the switch is history! I broke one and a guy cleaning the back seat area at the car wash broke the other. Looking at it the job seems simple, but of course the first side turned out to be a PITA. Having done it once, the second one only took about 30 minutes, so perhaps this will help someone. BTW, I have standard power seats that are heated. There may be slight differences in your seat...but this should get you 90% of the way there.
Warning: I've been told that if you turn on the ignition with the seat out you will trip the SRS code light, which requires a trip to the dealer to reset, or the Peake SRS tool. I did and it did. (Thanks for the "heads-up" Berman.)
Parts Needed
1 - Switch. BMW Part#: 61-31-1-383-475 or 61-31-1-383-476 @ $83.00 list
4 - Cushion Clips. BMW Part#: 52-10-8-130-678 @ $.09 each
Zip ties
Tools Needed
1 - T25 screwdriver
1 - T15 screwdriver
1 - 16mm socket
1 - Side cutter pliers
1 - Thin standard screwdriver
1 - Small Phillips screwdriver
First you have to remove the seat from the car.
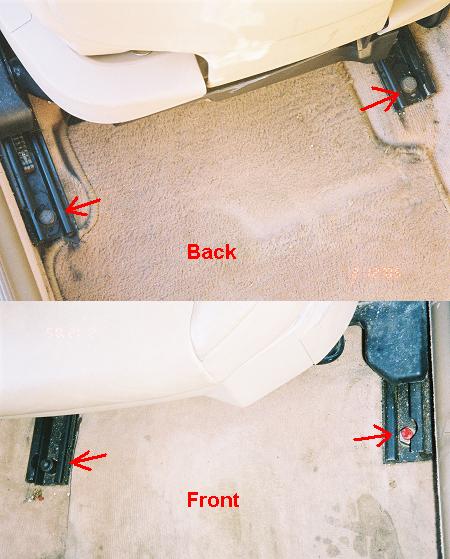
Step 1: Move the seat all the forward to expose the two rear bolts holding the seat rails to the floor. Use the 16mm socket to remove these bolts. Move the seat all the way back to expose the two front bolts. Pop the caps off the two front bolts and remove the nuts, also 16mm. Move the seat to a center position and disconnect the negative battery cable from the battery (says to do this in my TIS).
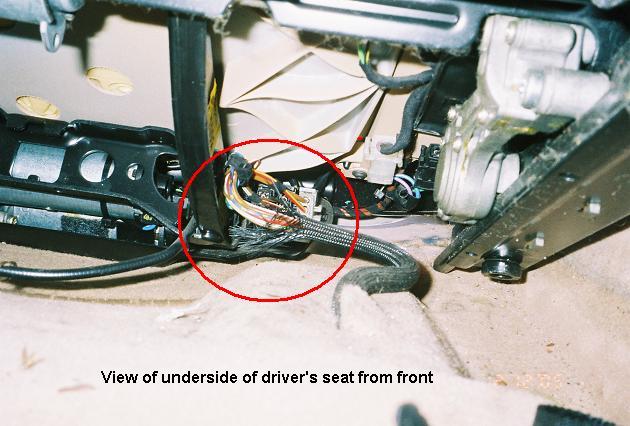
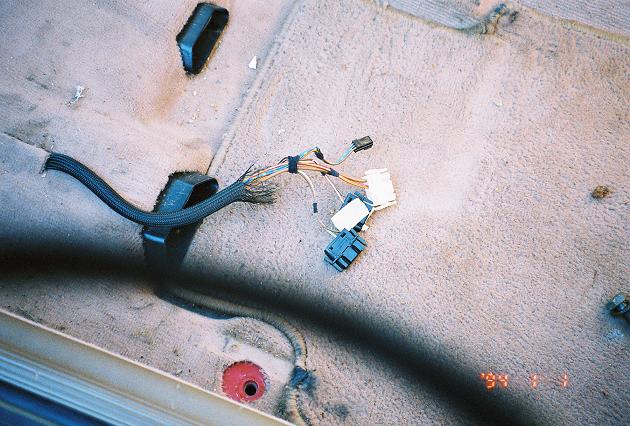
Step 2: Tilt seat back and rest against backseat. Disconnect the three large connectors and one or two small connectors under the seat. Indicate which connector goes in what plug by marking it with tape. All the other connectors are unique. The seat is now free, remove it from the car.
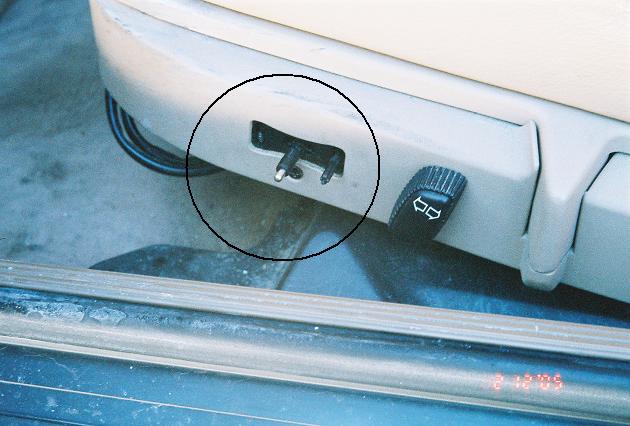
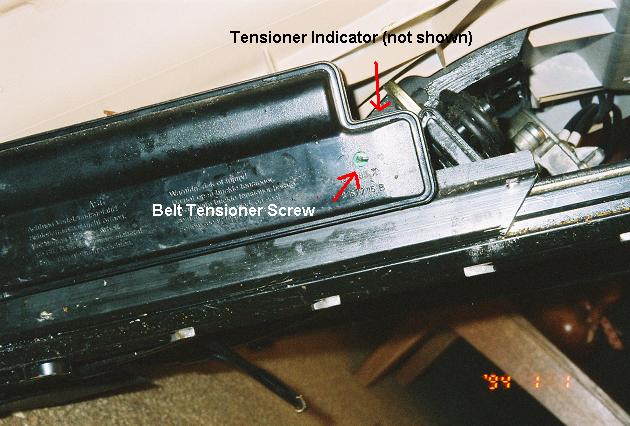
Step 3: Deactivate the seat belt tensioner. Turn the screw clockwise to deactivate. The display (B, not shown) will turn from green (activated) to red (deactivated).
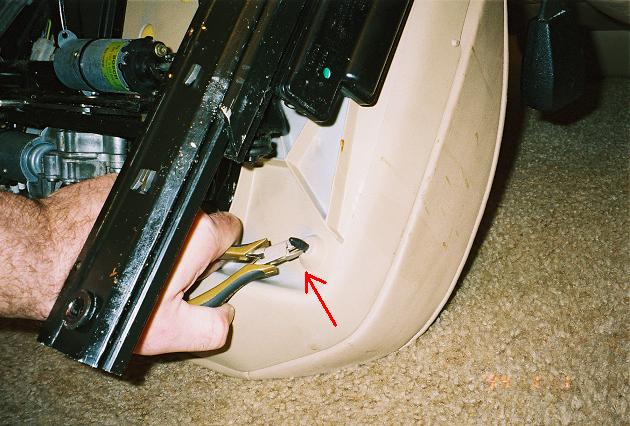
Step 4: Remove the seat cushion from the cushion shell by snapping off the four plastic clips with sidecutter. (I couldn't get a single picture of all four clips but they are located roughly at each of the four corners. You'll find 'em.) This allows you to fold the cushion back against the seatback to access and remove the four T25 Torx screws that hold the cushion shell to the frame.
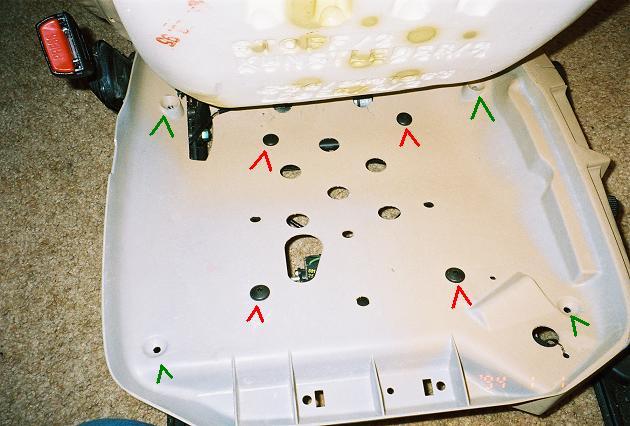
Here are the four T25 Torx screws to remove:
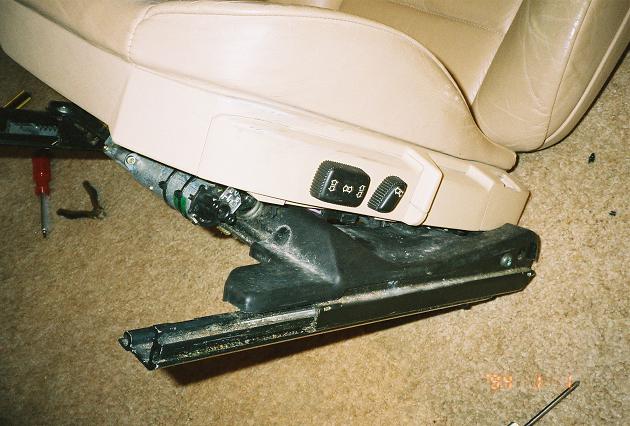
Step 5: Remove the four T15 torx screws that hold the side panel to the cushion shell. The one not shown (#3) is a PITA.

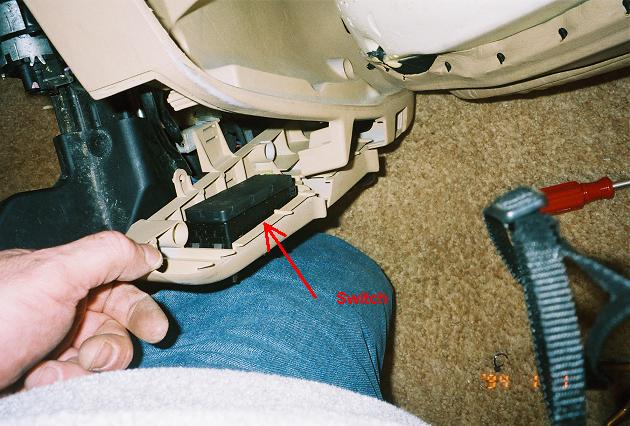
Step 6: If either control knobs are still on, remove them by prying carefully with screwdriver. Also, remove the small Phillips screw to free switch.
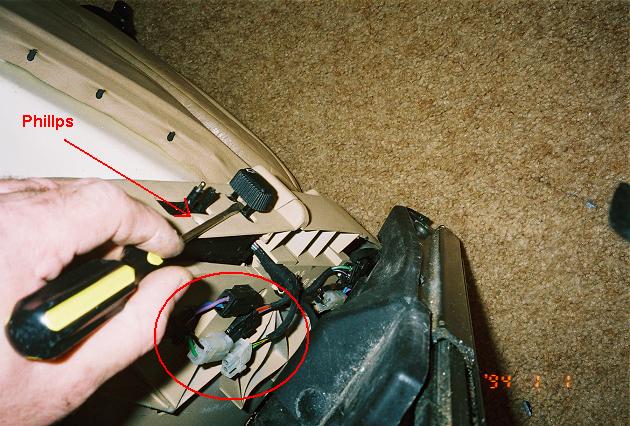
Step 7: Cut cable ties if needed to give yourself some slack. Remove side panel from the cushion shell. Use screwdriver to pry and disconnect the switch from the connector.
Step 8: Connect new switch and reinsert the side panel into the cusion shell. Install the phillips screw to secure the switch to the side panel. Pop the knobs back on.
Step 9: Cut the rest of the four broken clips as tight as possible to the flange on the cushion shell bottom. Push the remainder through into the foam. (You can drill these out too if you are having trouble pushing them up into the foam.) Install new clips as shown. Line up the clips and press cushion back into the cushion shell.

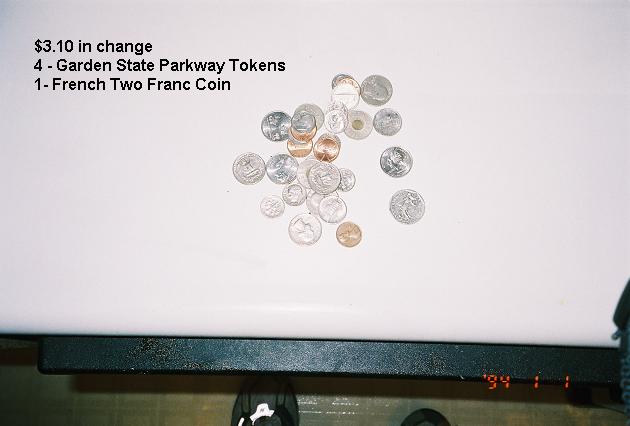
The rest of the installation is just the opposite of removal. Remember to activate the seat belt tensioner, re-do cut tie wraps, and plug all the connectors correctly. You're done. And put all the "treasure" you found under the seats toward your next mod. The petrified French-fries you can just throw away!
About The Author
hellrot325