Detailing Your Car
Detailing Your Car
In this version of the Great Paint Project, I will build on the experience that I learned when polishing Barb's 1994 Mercury Topaz to do a complete strip down, polish and wax of my Z3 using my new Porter Cable random orbit polisher.
The job that I plan on doing on my Z3 will be quite different that was done on the Topaz. My plans for my car are as follows:
* Strip off any existing wax
* Prepare the paint surface by using a clay product to eliminate any surface contaminants
* Polish the paint with the Porter Cable polisher
* Wax the paint with the same polisher
Current status of paint: The Arctic Silver paint on my '98 Z3 is in pretty good shape with some minor surface scratches which are only visible in certain angles. There are also about 3-4 stone chips in the front which I don't expect to fix with this process.
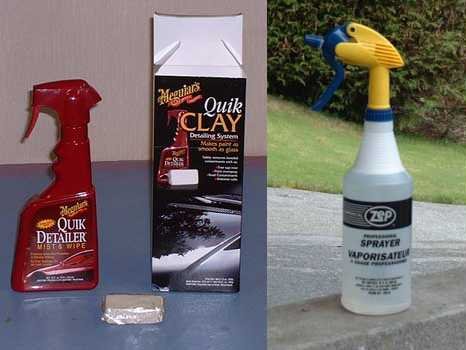
In order to prepare the paint surface properly before I started polishing, I picked up Meguiar's Quick Clay. It comes with a 3.5 oz. bar of clay which should be enough to do my Z3 several times. The only thing that I was concerned about was the small amount of "lubricant" that came with the clay bar (it was a 473mL (16 oz) bottle of Quick Detailer). Figuring that I would need more lubricant for the job, I bought a 32 oz spray bottle from Home Depot. For lubricant, I mixed 2 oz. of liquid car wash into the bottle and the other 30 oz would be just plain water.
The products that I have planned on using on my car are Meguiar's #3 Machine Glaze and #26 Hi-Tech Yellow Wax. Both of these products are designed for dual-action machine application which is what I was looking for. I had previously used P21S Carnauba paste wax on the Topaz but found that it just wasn't well suited for use with a power polisher. While I have used P21S on my Z3 for about a year (applied by hand) very successfully, I needed to find a liquid wax for this job.
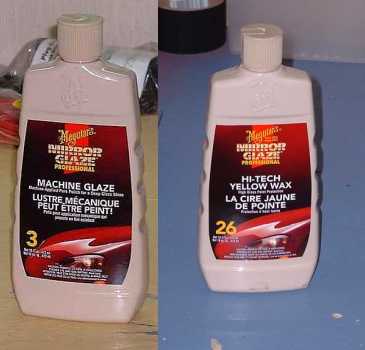
Based on a recommendation from someone at Meguiar's, I was originally planning on using a different wax but I was not able to find these locally so I picked up #26 instead based on some quick, last minute research. Worst case, I figured that I would have to find a new wax if this one didn't work out.
Time Check: 0 hrs, 0 min <-- This is a time check of how long the job was taking
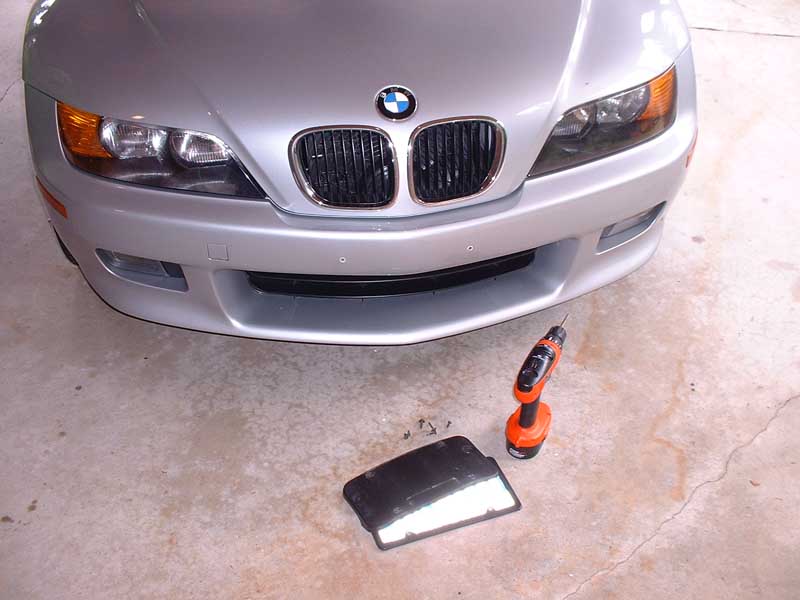
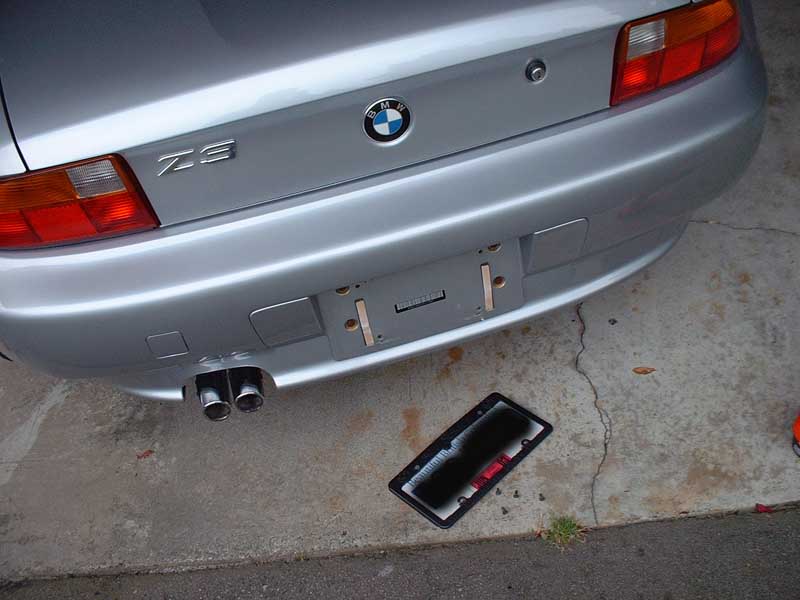
Part of the preparation that I do before waxing is to remove the front and rear license plate holders. Not only does this make it easier to wax in these areas, but there's also less chance of getting wax on the black frames.
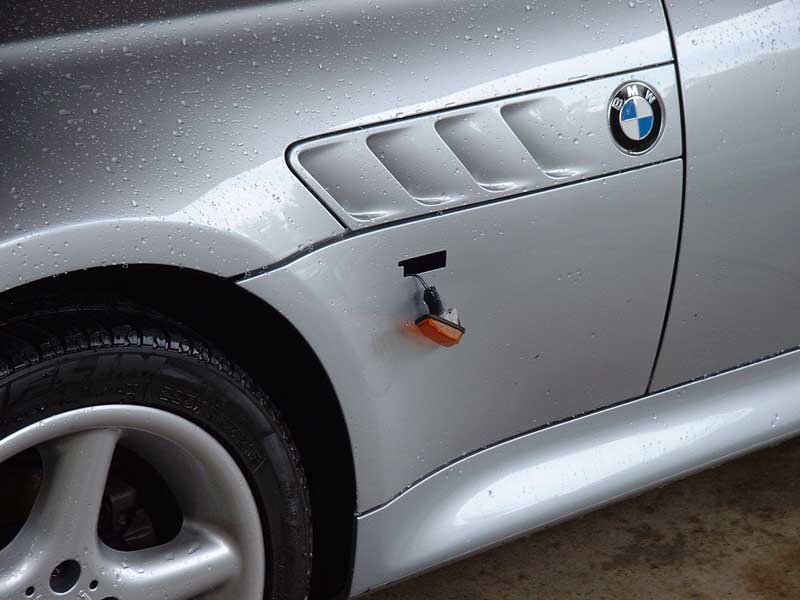
Next to come of are the side marker lights. By pushing the lens towards the front of the car and then pulling outwards, the lens can be removed. The lens can then be separated from the wire by pressing on the small tab.
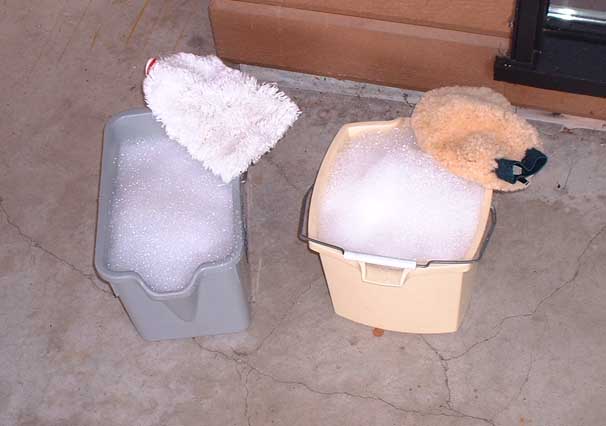
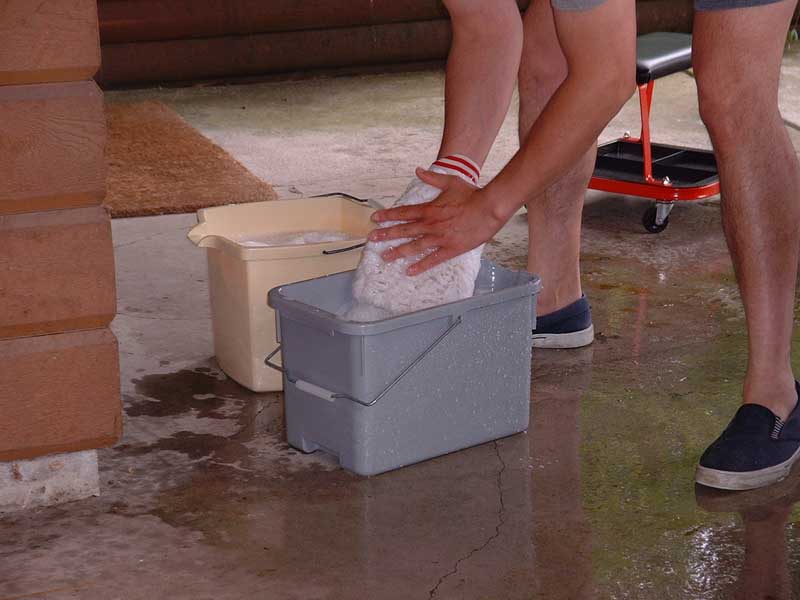
My normal car wash routine involves using two buckets and two wash mitts. I use the chenille cotton mitt (in the grey bucket) for the lower half of the car and the sheepskin mitt is for the top half of the car. The separate buckets keep the dirtier water from the lower half of the car from potentially causing scratches on the top (more visible) half.
Note about sheepskin mitts: Not all sheepskin wash mitts are the same. The one I buy is a Simoniz premium sheepskin mitt which I buy from Canadian Tire. There is an identical looking mitt at Wal-Mart for less than half the cost. I tried one of these once and found the "wool" falling out after the 3rd use. The quality one lasted me over 6 months of being used once a week.
The difference between the procedure being described here and what I normally do to wash the car is that I will be washing with Dawn dishwashing liquid. Washing with a liquid like Dawn will completely remove any existing wax from the car. I put a very small amount of liquid into each bucket (about 2 tablespoons). The last thing that you want when washing your car is a huge bubble bath.
Important: The more suds you have, the more difficult it will be to remove them off of your car.
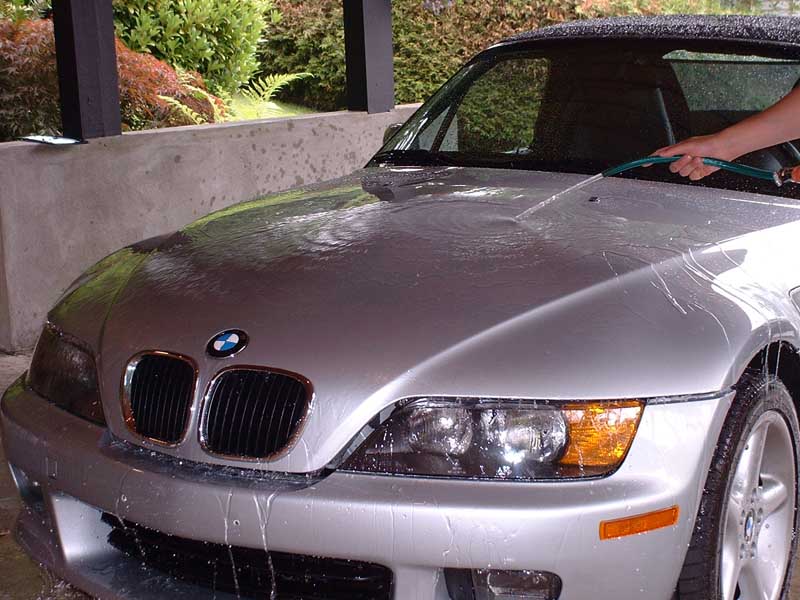
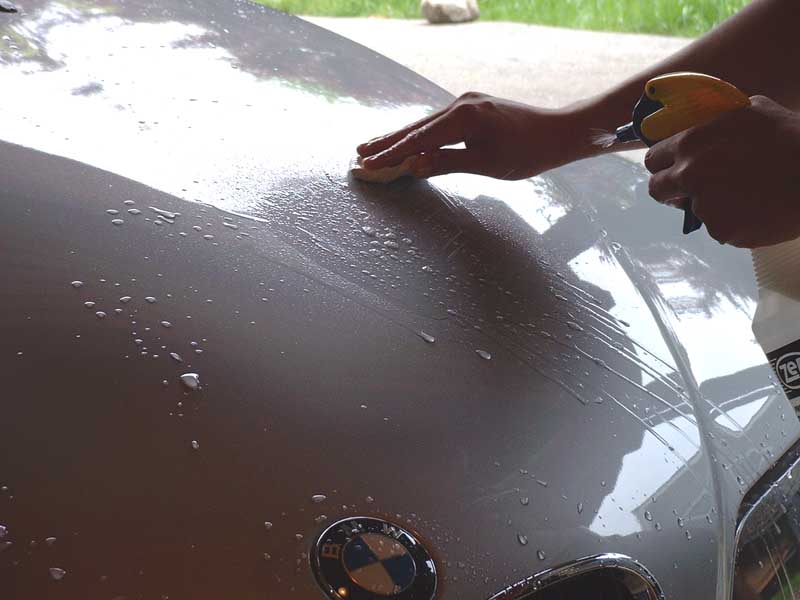
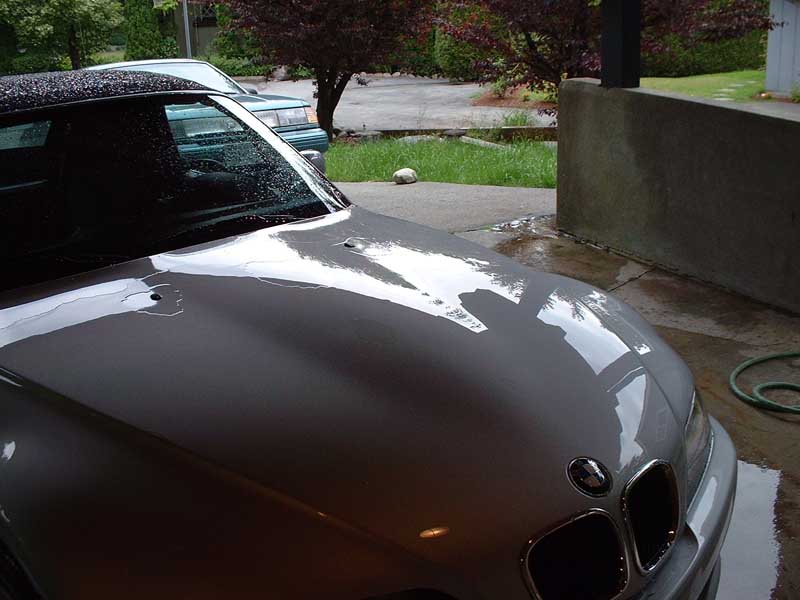
This is a picture of what the hood of my car looked like after I have washed it but before rinsing. Note the virtual lack of suds on the hood. The objective of using any kind of soap should be to use the least amount of soap that will allow you to clean your car properly. Anything beyond that is not only a waste, but you run the risk of leaving some of the soap on the car if not rinsed properly - which will cause soap stains.
Since I'm using the cotton wash mitt for the lower part of the car, it usually gets much dirtier than the sheepskin mitt (which is deliberate since the sheepskin mitt is much harder to clean). As a result, once this mitt gets dirty it has to be rinsed thoroughly before continuing. I usually use my left hand to scrub the mitt back and forth as I plunge it in and out of the bucket. This technique usually does a good job of releasing the dirt into the water in the bucket.

When rinsing the car to wash off the soap, I use an attachment on the hose that allows a free flow of water. I feel that this does the best job of removing the soap from the car without "foaming" it as a nozzle would do and the water is allowed to just carry the soap and dirt away off the car. This technique also helps the water "sheet" off the car so drying time is reduced.
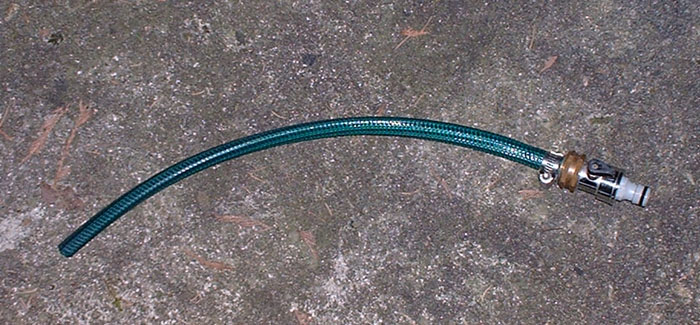
This following shows the details of my custom made hose adapter.
This is my car wash hose all assembled. The whole thing is basically a 2ft length of garden hose attached to a brass fitting which would normally attach to the end of your garden hose. To make things more convenient, I have added a shut-off valve so I can shut the flow off (or regulate it) at the end of the hose.

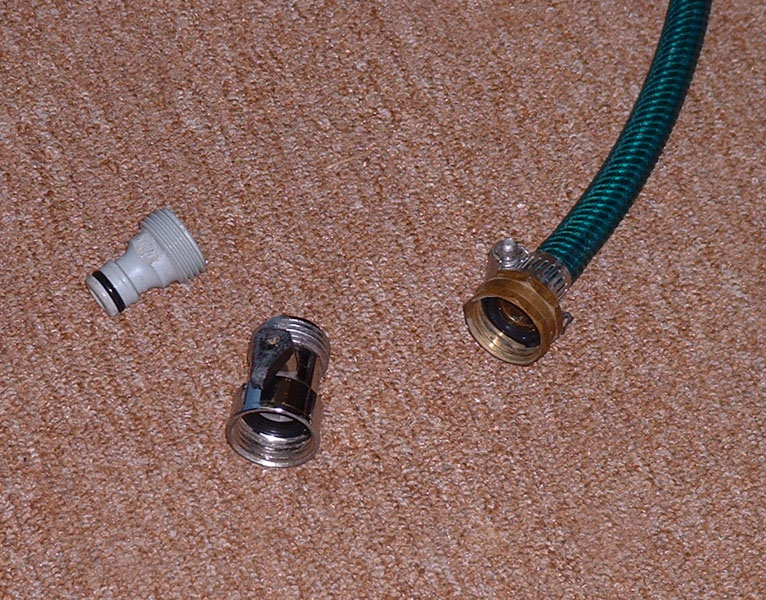
All of my hoses have the orange/white "Gardena" quick connect adapters installed which connect to the gray adapter shown (below). If you don't have this on your hose, the just ignore these items
Here's a close-up of the individual parts.
Now, back to the car
After washing the car, I rinse the whole car once again with water to ensure that there were no stray pieces of dirt on the paint before going to the next stage.
After the car was washed with Dawn, the paint had completely lost any "slickness" and my finger squeaked at the slightest touch over the paint . I have hand rinsed the sheepskin mitt under cold water and the cotton mitt was thrown into the washing machine with a small amount of detergent. I was now prepared to start with the claying.
Time Check: 1 hour, 0 min
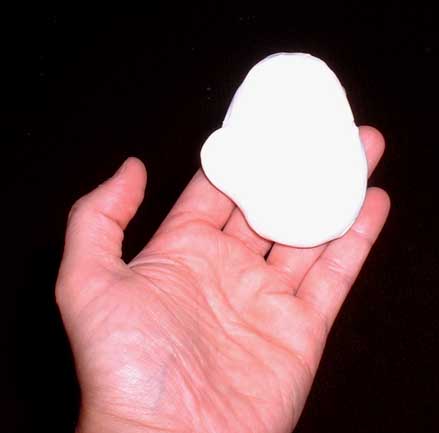
After taking the clay out of the plastic wrapper, I kneaded it into a small flat pancake shape. I found that wetting it slightly made this first step a bit easier.
The purpose of using a clay product on the paint is to remove any surface contaminants that get embedded into the paint over time and is a perfect priming step before polishing and waxing.
Never having clayed a car before, I did a lot of reading to try and learn as much as possible before starting. The most important thing that I learned was that the paint surface must be kept extremely well lubricated at all times to avoid scratching. During the claying process, I was spraying the car around where I was claying about once every 5 seconds. Considering that I only had about 25 cents worth of car wash in the entire 32 oz. sprayer, I saw no down side to over spraying with the lubricating solution.
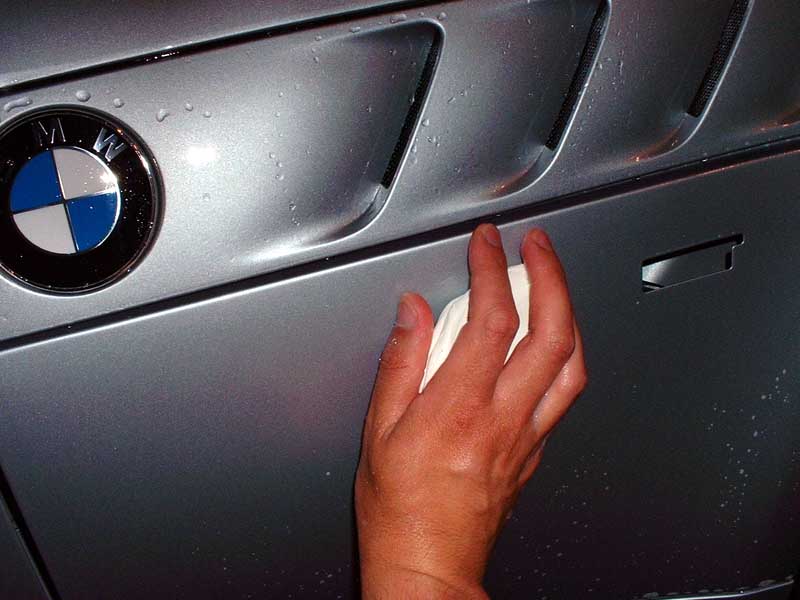
Claying is a very tactile process. What I mean is that you are using your fingers to feel your way along. As you rub the paint with the clay, you feel the little "bits" in the paint under the clay and these gradually go away as the clay removes them. As soon as you stop feeling these bits in the paint and there are no more visible blemishes on the surface of the paint, you should move onto the next section. I am usually working on a small section at a time (about 2ft x 2ft). About every two sections, I take the clay and fold it in on itself a few times into a ball then flatten it out. This process takes the dirt that gets embedded into the clay (removed from the paint) and moves it into the centre of the clay so a fresh section is made.
After I complete a whole body panel, I would stop and rinse the panel thoroughly with water before going onto the next section.
One of the things that I noticed about using the clay bar was that if I stopped the clay on the surface of the paint, it would often leave a small "smudge" the colour of the clay bar on the paint. This smudge would come out with further claying but it taught me to always keep the clay bar in motion when touching the paint.
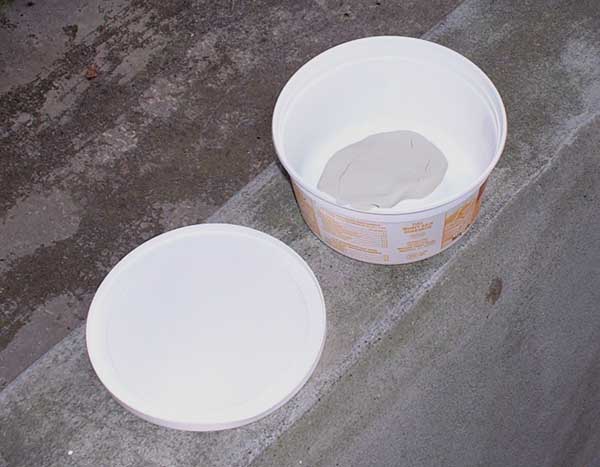
One of the things that was going though my mind as I was claying was that if I ever dropped the clay bar on the ground, that I would probably be throwing it in the garbage and driving to the store to buy a new one (dropping it onto the ground would embed many particles of dirt which would then easily scratch the paint if the clay was used again). Since I wasn't going to be doing the claying non-stop on the whole car without a break, I got a small, clean plastic margarine container ready to put the bar in when I needed to. This is also where I now store the clay bar after the job was finished.
Claying is a very tactile process. What I mean is that you are using your fingers to feel your way along. As you rub the paint with the clay, you feel the little "bits" in the paint under the clay and these gradually go away as the clay removes them. As soon as you stop feeling these bits in the paint and there are no more visible blemishes on the surface of the paint, you should move onto the next section. I am usually working on a small section at a time (about 2ft x 2ft). About every two sections, I take the clay and fold it in on itself a few times into a ball then flatten it out. This process takes the dirt that gets embedded into the clay (removed from the paint) and moves it into the centre of the clay so a fresh section is made.
When you're claying on the vertical surfaces like the doors, the chances of dropping the clay bar are considerably greater. Considering that you're dealing with a slippery product and spraying more wet soapy water onto it every few seconds, I'm surprised that I didn't drop the thing several times. To reduce the chance of this happening when working on the sides of the car, hold the clay bar with your fingers over the top so that your fingers are touching the paint as well.
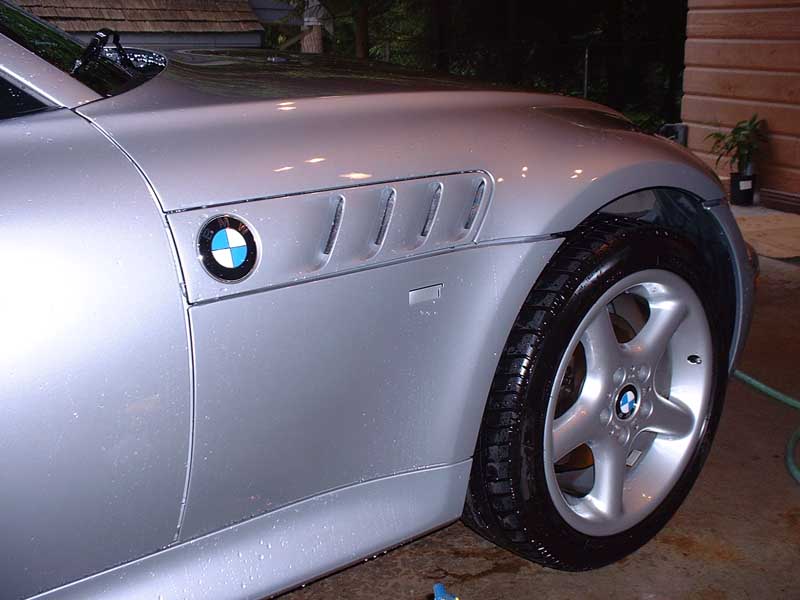
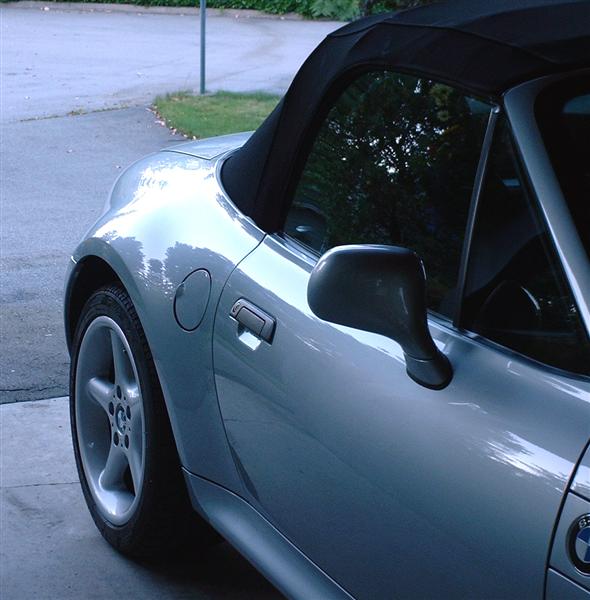
After the car was completely clayed and rinsed clean, I was surprised on how good the paint still looked. From this angle, the paint was still quite reflective even though every last drop of wax was now long removed.
Time Check: 2 hrs, 0 min
After the claying is completed, I washed the car again with my regular car wash to remove any residue left over from the claying process. The car was then dried with my synthetic chamois and is ready to start polishing.
It is important to completely dry the car before proceeding with the polishing and waxing. This means opening the trunk, hood and doors and getting into all of the crevices with a cloth to dry everything.
Time Check: 2 hrs, 55 min
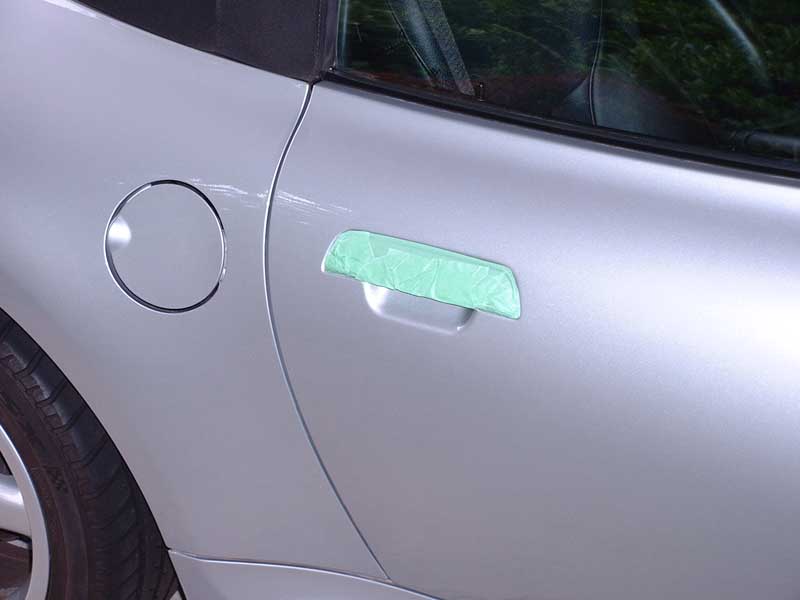
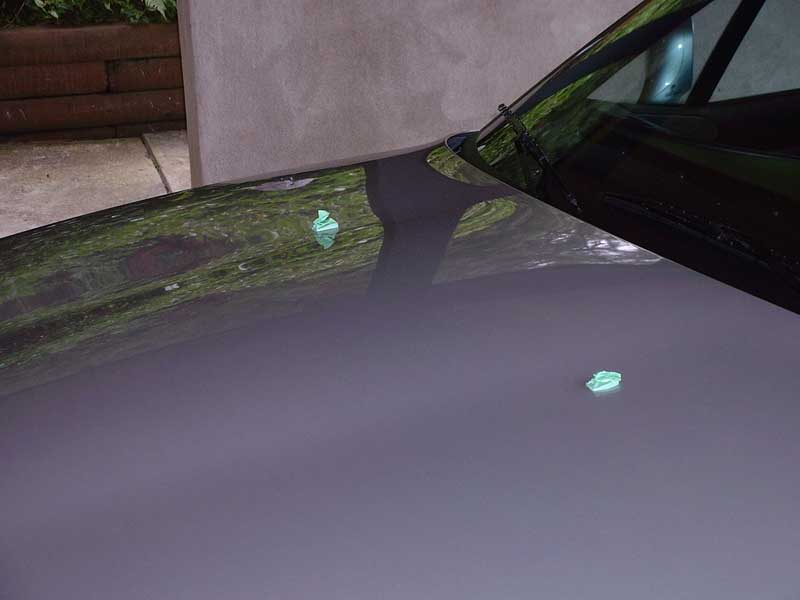
Before I start polishing, I tape over the door handles and wiper nozzles with green painter's tape. Without covering these up, with one swipe of the polisher I'll be spending time later on removing a white hazy coating from these spots.
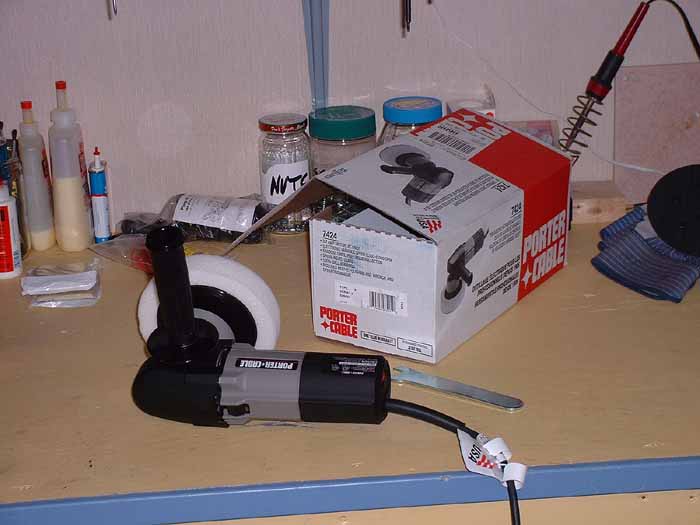
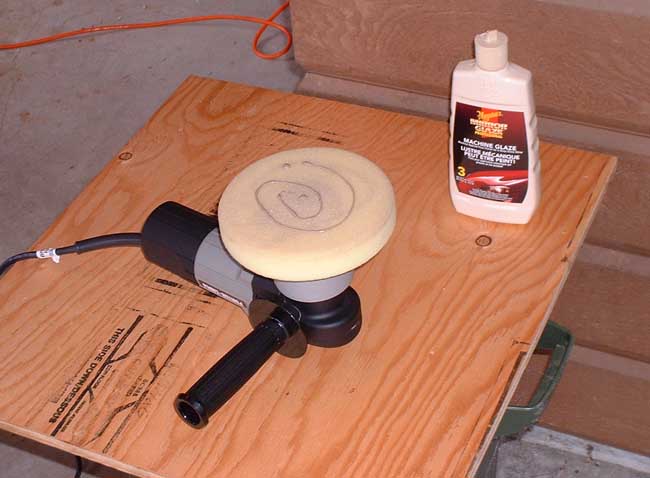
I purchased the Porter Cable random orbit buffer model 7424. It came with the white foam buffing pad and a 5" counterweight.
The first thing that I purchased was a 6" velcro backing plate (Porter Cable part#18001) and a 6" counterweight. I wanted this so that I could buy the foam velcro buffing pads that would be easy to install and remove.
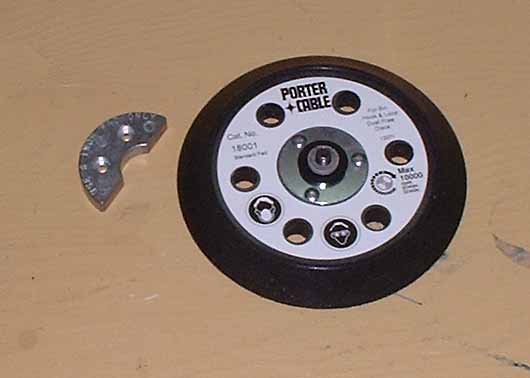
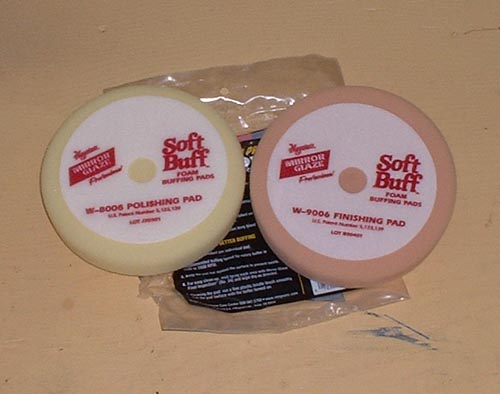
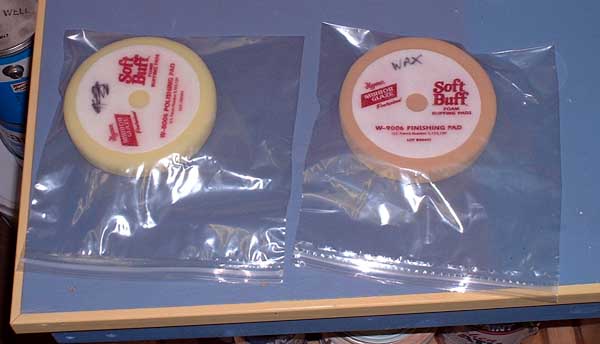
I then purchased some Meguiar's 6.5" velcro buffing pads (Softbuff Foam Polishing Pads part# W-8006 and Softbuff Foam Finishing Pad part# W-9006). The finishing pad will be used for only for waxing.
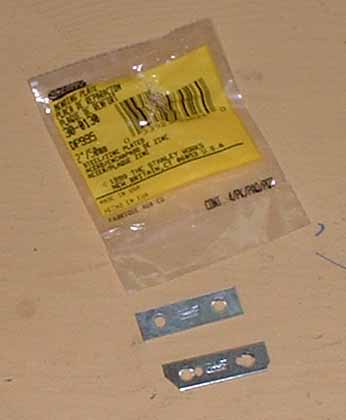
The model 7424 buffer came with a 5" counterweight. The 6" counterweight is needed to offset the extra weight of the larger 6" velcro backing plate and pads. Without this extra weight, the buffer vibrates quite a bit and would be very uncomfortable when using it for several hours at a time. When I installed the 6" weight, the 6" backing pad and a buffing pad, I still noticed that there was a bit of vibration. After experimenting, I figured that there needed to be extra weight added so I fashioned some metal brackets to fit under the counterweight. This small extra weight made a huge difference and virtually eliminated any vibration with the 6" backing plat and pads.
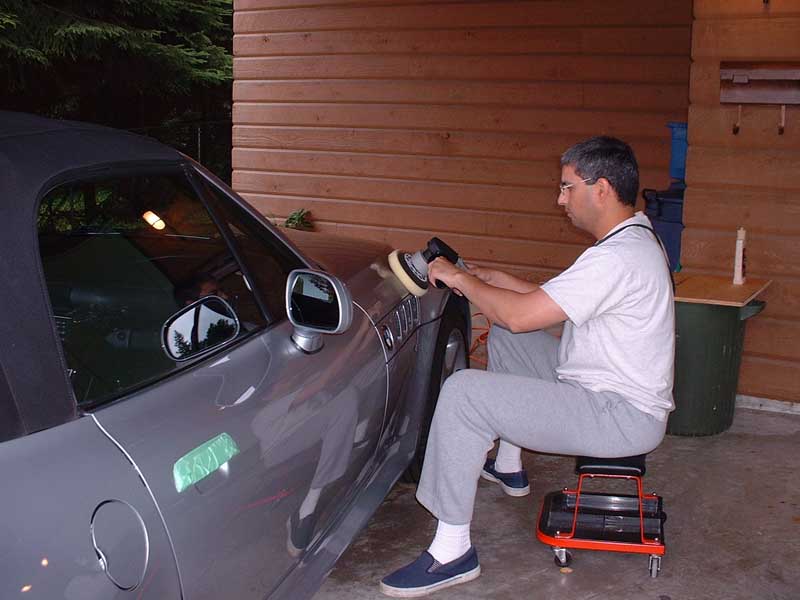
This chair is what I use when washing the wheels on my Z3. This has to be by far, the most useful tool to own when waxing a car (by hand or machine). With this chair, I can wax from end to end of the car in one uninterrupted pass. It also makes a huge difference on my back when waxing the lower sections.
If you are working on your car on a flat surface, this kind of chair is a must buy.
Before using the Porter Cable buffer for the first time, I gathered as much information as possible on how it was used. One good source was on the Meguiar's web site where they had a video on its use. See Power Polishing Safe & Easy here
Important tip: Before using the Porter Cable buffer with a velcro backing plate like the one I purchased, you'll need to attach the foam buffer pad correctly. The most important thing is to get the foam pad centred onto the backing plate. This is pretty much a manual process and you'll have to eyeball the position of the backing plate before pressing the two halves of the velcro sides together.
You'll know how centred it is by just manually spinning the foam pad and see how much it "wobbles". If it's off centre, just remove it and adjust again. The more centred you get it, the less vibration you'll feel when buffing.
Since I have washed this polishing pad since the last use, it has to be "primed" again. This basically involves putting more than the usual amount of the Meguiar's #3 Machine Glaze polish on the pad and pressing in onto the car once or twice to press it in. This picture shows how much polish I used to prime.
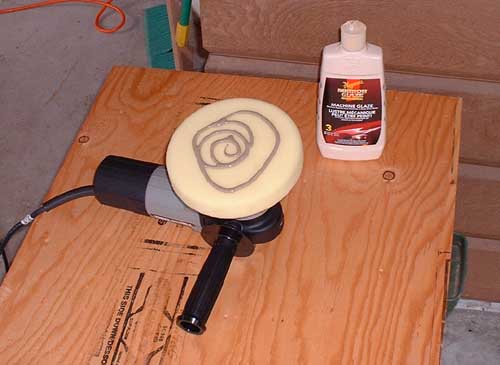
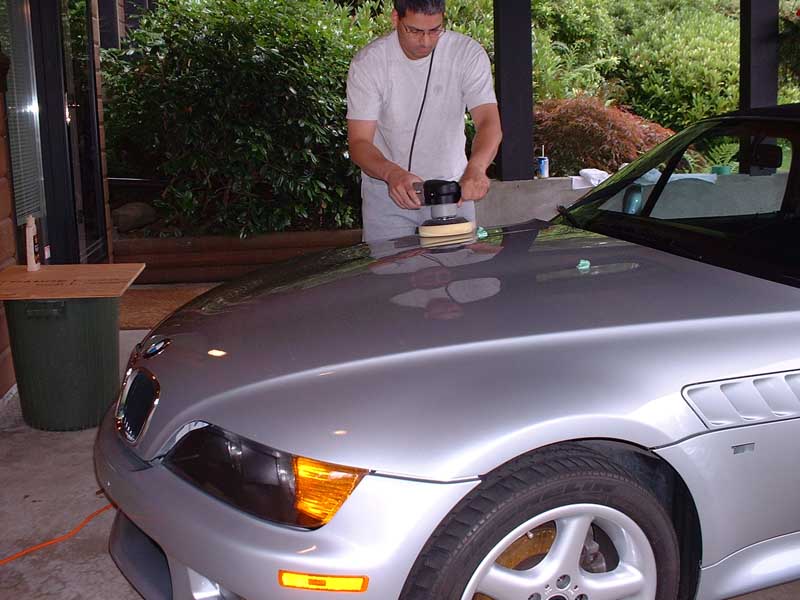
For all polishing, I set the Porter Cable speed to about 4.5
After the pad is primed, much less polish is needed. This amount of polish will cover about 1/3 of my hood.
Keeping the cord away from you while you're polishing is very important as well as always remembering to start and stop the Porter Cable polisher while it is in contact with the car. With the #3 polish, I continue to polish each section until most of the polish has buffed away (about 60-90 seconds). After this I buff the section clean with a cotton cloth. This buffing takes very little effort.
The polishing is now completed.
Time Check: 4 hrs, 10 min
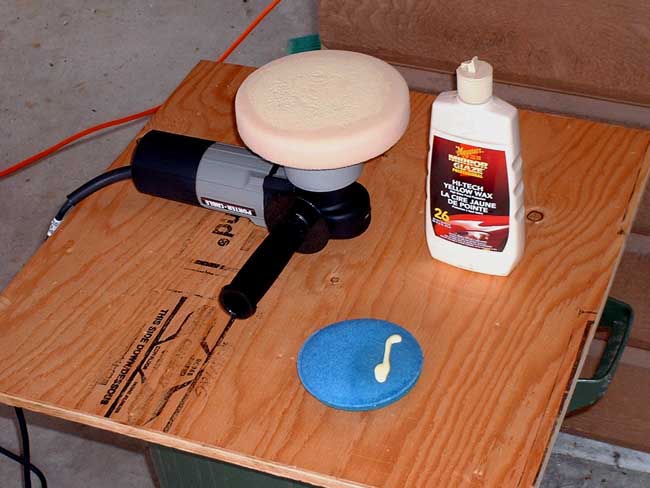
I am now moving onto the waxing stage using Meguiar's #26 Hi-Tech Yellow Wax. I have replaced the polishing foam pad with the finishing pad. Again, this pad needs to be primed before starting as it was washed last time when I used P21S wax on Barb's Topaz.
For all waxing, I set the Porter Cable speed to about 4.5
The round blue wax applicator is a prerequisite when using any polisher like the Porter Cable. It is simply impossible to wax the entire car (like a Z3) with a polisher as there too many places where the polisher cannot get to (example: around the side mirrors). If you're intention is to wax the entire car, you'll have to get into these places with a hand applicator.
I found that I was using about 2-3 times as much of the #26 wax as I was of #3 polish for the same area as the paint just seemed to "drink" the #26 up. After about 60 seconds of buffing one section with the Porter Cable, the wax seemed to be close to disappearing. At this stage, it took just a few seconds of light hand buffing with the cotton cloth to see my handiwork appear before my eyes. Not only did this outstanding shine start to come alive, but I started seeing this "wet look" in the paint that I had never seen before. Without a doubt, this wax is an excellent product and was able to produce results better than any wax that I had used before (see conclusions on page 5).
After finishing the rest of the car in this manner, the waxing is almost complete. I finish up by applying a second coat of wax by hand to the areas of the car behind the front and rear tires. On most cars, these areas usually see a lot of dirt from water splashing off the tires during the rain.
After finishing, I store the pads in a plastic Ziploc bags. I do not remove the polish/wax from the pads. Doing so requires that I will have to prime the pad again next time which basically wastes product. The only reason why I washed the pads in the past was because I planned on using a different polish or wax the next time. You never want to mix products onto a pad without washing it first.
Washing a foam pad is done easily by washing it in a small amount of Dawn dishwashing liquid and then rinsing it well with water. Dry on a towel.
Time Check: 5 hrs, 35 min
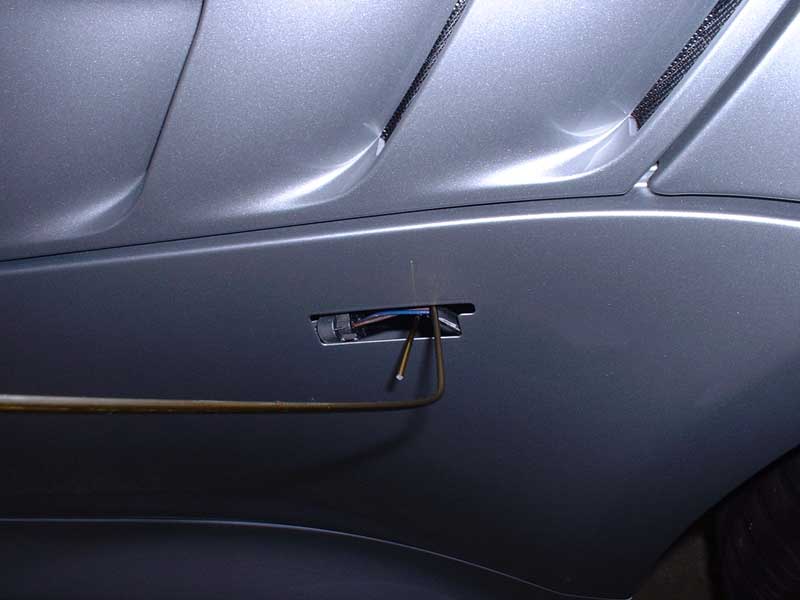
Now that the waxing was complete, it was time to put things back together again. The green masking tape came off easily and the front and rear license plates were put back. During the polishing/waxing stages, the wires for the side marker lights had fallen into the fender. By using a small flashlight and a bent coat hanger, the wire is easy to fish out.
TIP: Don't put the license plate holders on with a power screwdriver or drill (screw in by hand only). Because the screws are going into plastic, they strip very easily. Doing it by hand takes about 90 seconds longer but will prevent stripping the mounting holes.
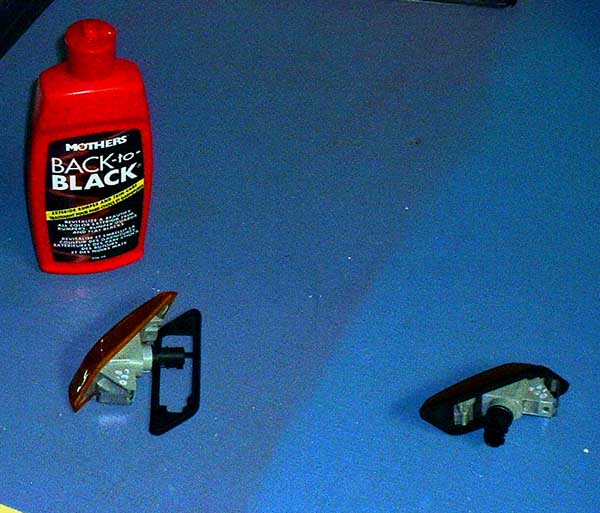
Before I remount the side marker lights, I take the rubber edging out and clean it in the Mother's Back to Black solution. This stuff not only makes it a nice black colour again but revitalizes the rubber. The stuff also has the most pleasing cherry smell!
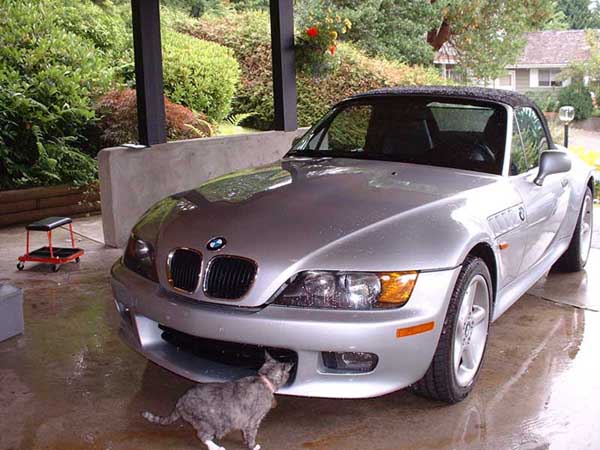
The following are some pics of the final results. Unfortunately, my digital camera really doesn't do justice to the impressive shine that my car now has.
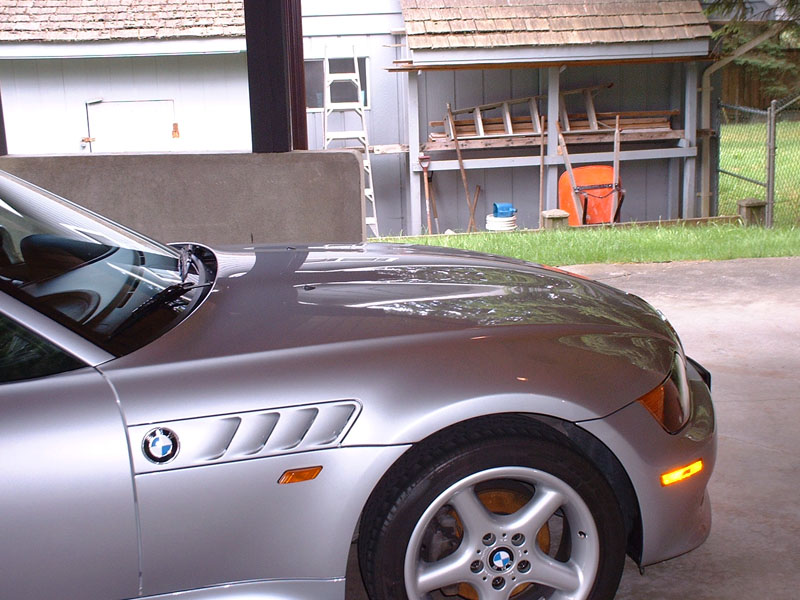
This is a picture of the car taken one week after I waxed. During this one week, I have driven through about 2 hours of rain on the highway but have not washed it yet. To say the least, I am extremely impressed with the wax's ability to shed water and dirt so far.
During the process of cleaning up my car for this project, I utilized many of the products in my cleaning kit. Here a rundown of just about everything that I own that gets hauled out every week.
I picked up this white plastic caddy soon after I started purchasing detailing supplies to help carry them and keep them organized.
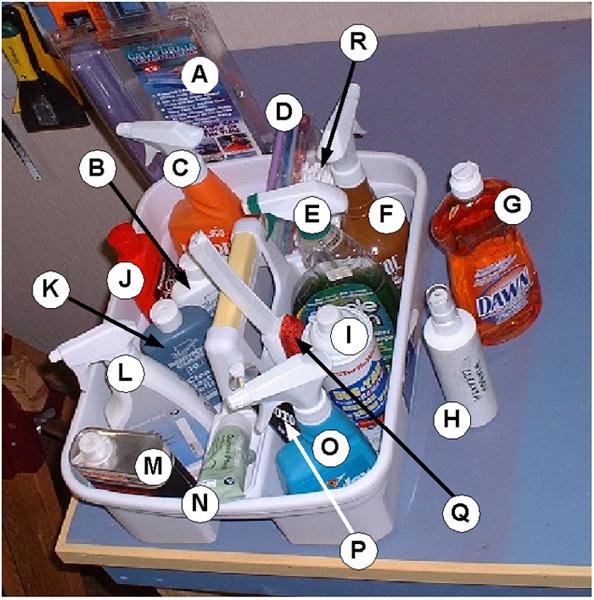
A - Original California Water Blade. Used to remove water from the car after washing.
B - Meguiar's Mirror Glaze #17 Plastic Cleaner. Used to remove scratches in the plastic rear window and bring it back to life.
C - Lexol Leather Cleaner. Used only occasionally (twice a year) as I don't want to over clean the leather.
D - Assorted toothbrushes. Used to remove grime and dried wax from out of the way places. Have at least one with a rubber tip.
E - Simple Green. 50% diluted with water used to clean my wheels. Some wheels with a more complex pattern may require a different product than this.
F - Lexol Leather Conditioner. I use this about once a month on my leather seats.
G - Dawn dishwashing liquid. Used to wash my car only when I want to strip the wax. Too strong to be used regularly.
H - Spray bottle for cleaning windows. Filled with home made window cleaning solution of: 8 parts water, 1 part white vinegar, few drops of dish washing liquid (shaken, not stirred, lightly before each use)
I - Turtle Wax Bug and Tar Remover. Used to remove stubborn tar stains. Very rarely needed as the car is washed weekly and most stains come out with regular car wash.
J - Mother's Back to Black. Used to dress black plastic and rubber trim on the car.
K - Meguiar's Mirror Glaze #10 Clear Plastic Polish. Used to remove scratches in the plastic rear window and bring it back to life (used in conjunction with #17 cleaner - see B above)
L - BMW Cabrio cleaner. Used to wash the canvas top on my car.
M - MotorCraft Road Tar Remover. Same as I (above). Also used very rarely.
N - BMW Gummi-Phledge. Excellent BMW product to revitalize rubber weather seals on cars. An absolute must for cabrio owners. BMW part# 82-14-9-407-015
O - Lexol Vinylex. Product I use to protect the vinyl parts of the car (like the dash) as the product it has good UV protection. I prefer it better than product like Armour All as Vinylex leaves very little shine.
P - AutoSol Metal polish. Used to polish chrome exhaust tips.
Q - Lint brush. Used for quick touch-ups on the cabrio top.
R - Q-Tips. Used to get into those small places to remove dust and wax residue.
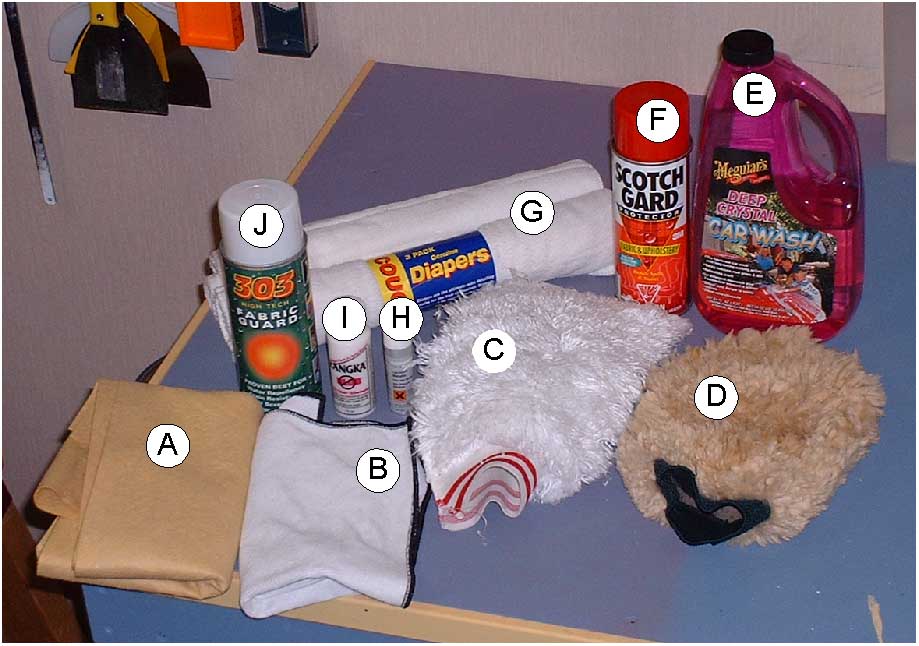
A - Synthetic chamois. This is the main tool I use to dry my car. I have tried natural chamois' and feel that this inexpensive synthetic type is much better.
B - Meguiar's micro fibre detailing cloth. Great for cleaning the windows with my home made solution (see H above)
C - Chenille cotton wash mitt. Used to wash the lower parts of my car.
D - Simoniz premium wool wash mitt. Used to wash the upper parts of my car.
E - Scotch Guard Fabric & Upholstery protector. Used to protect the floor mats against water and other stains.
F - Meguiar's Deep Crystal car wash. The car wash I use.
G - Cotton diapers These are "cotton diapers" that I use to buff the wax and polish from my car.
H - BMW Arctic Silver touch up paint. Touch up paint for my car bought from BMW dealer.
I - Langka. Used to remove the "blob" when applying the touch up paint.
J - 303 Hi Tech Fabric Guard. I used this product to renew the waterproof capabilities of the canvas top.
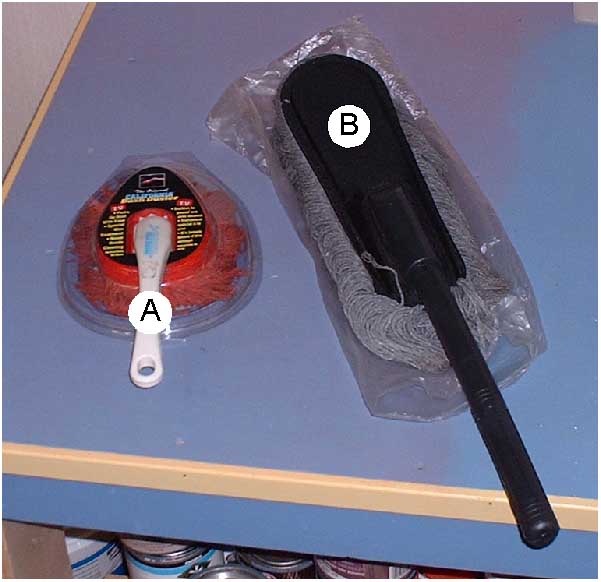
A - Original California Dash Duster. Used to dust the interior of the car.
B - Generic car duster. This is a larger version of the Dash Duster but a generic version of it. This duster does a great job of removing road dust by gently wiping the car without putting any pressure. Perfect if I just waxed the car and it has picked up some dust.
A few days ago, I received this new micro fibre drying towel that I ordered from Griot's Garage. This towel measures 25" x 35" and is intended to be able to dry a car completely without having to be wrung out.
Conclusions
This was the second time that I've used the Porter Cable random orbit buffer and I'm now fairly comfortable with my decision to buy it. Although there are definite time savings over polishing/waxing my car by hand, I believe that the main two benefits are the hugely reduced effort and the absolutely fabulous look that my car has now. After spending about 6 hours on this procedure, my arms did not feel tired at all. In the previous times of hand waxing my car, my arms were shot for several days.
I can't say enough about Meguiar's #26 Hi Tech Yellow wax. When I first bought it, I was looking for two other waxes to replace the P21S wax that I had used successfully for about a year. About the only qualifying factor for my buying this wax was that it was stated as being suitable for use with a dual action buffer like the Porter Cable. I figured that worst case scenario, it would buy me some time to find a better wax. As it turned out, that's definitely no longer required as I have found a wax that has met all of my requirements. Not only does this wax go on well using the Porter Cable but it provides an outstanding shine. My long term observation will be the longevity of the wax.
I felt that claying the paint really made a big difference to the overall look and feel but I don't see myself doing this more than about once a year. Before I started I had some small scratches in the paint (only visible at certain angles) and I believe that the polishing phase removed about 95% of these scratches. The paint just looks fabulous now.
I did a lot of researching over the past few years to help me determine which products I wanted to try using. The one conclusion that I've come to is that given enough time researching on the Internet, I feel that it is possible to find someone, somewhere that will say that any product works well. There are just so many car care products out there and so many opinions, if you do a search on any product, you're bound to find someone who's using it and raving about it. Keep this in mind when reading this information. Just because I have a web site and have detailed my experiences, doesn't make me more knowledgeable than you.
My best advice that I can give is to keep an open mind and always be willing to experiment. Listen to many opinions but only adopt what makes sense to you and what you're comfortable with. All of the products that I have listed on these pages work very well for me given the way that I use them on my car. You may find similarly good results using completely different products and different methods. I look forward to hearing your views and learning from them.
About The Author
Baden Smith (July 2002)
smithnet.ca